
2167 Bronson
HOA Front Yard Refresh
INTRO + PROJECT PLANNING | GARDEN DESIGN + SECTIONS | PLANT + MATERIALS SUMMARY | RECOMMENDATIONS | RESOURCES
Your Project Page
QUICK OVERVIEW OF WHAT’S INCLUDED
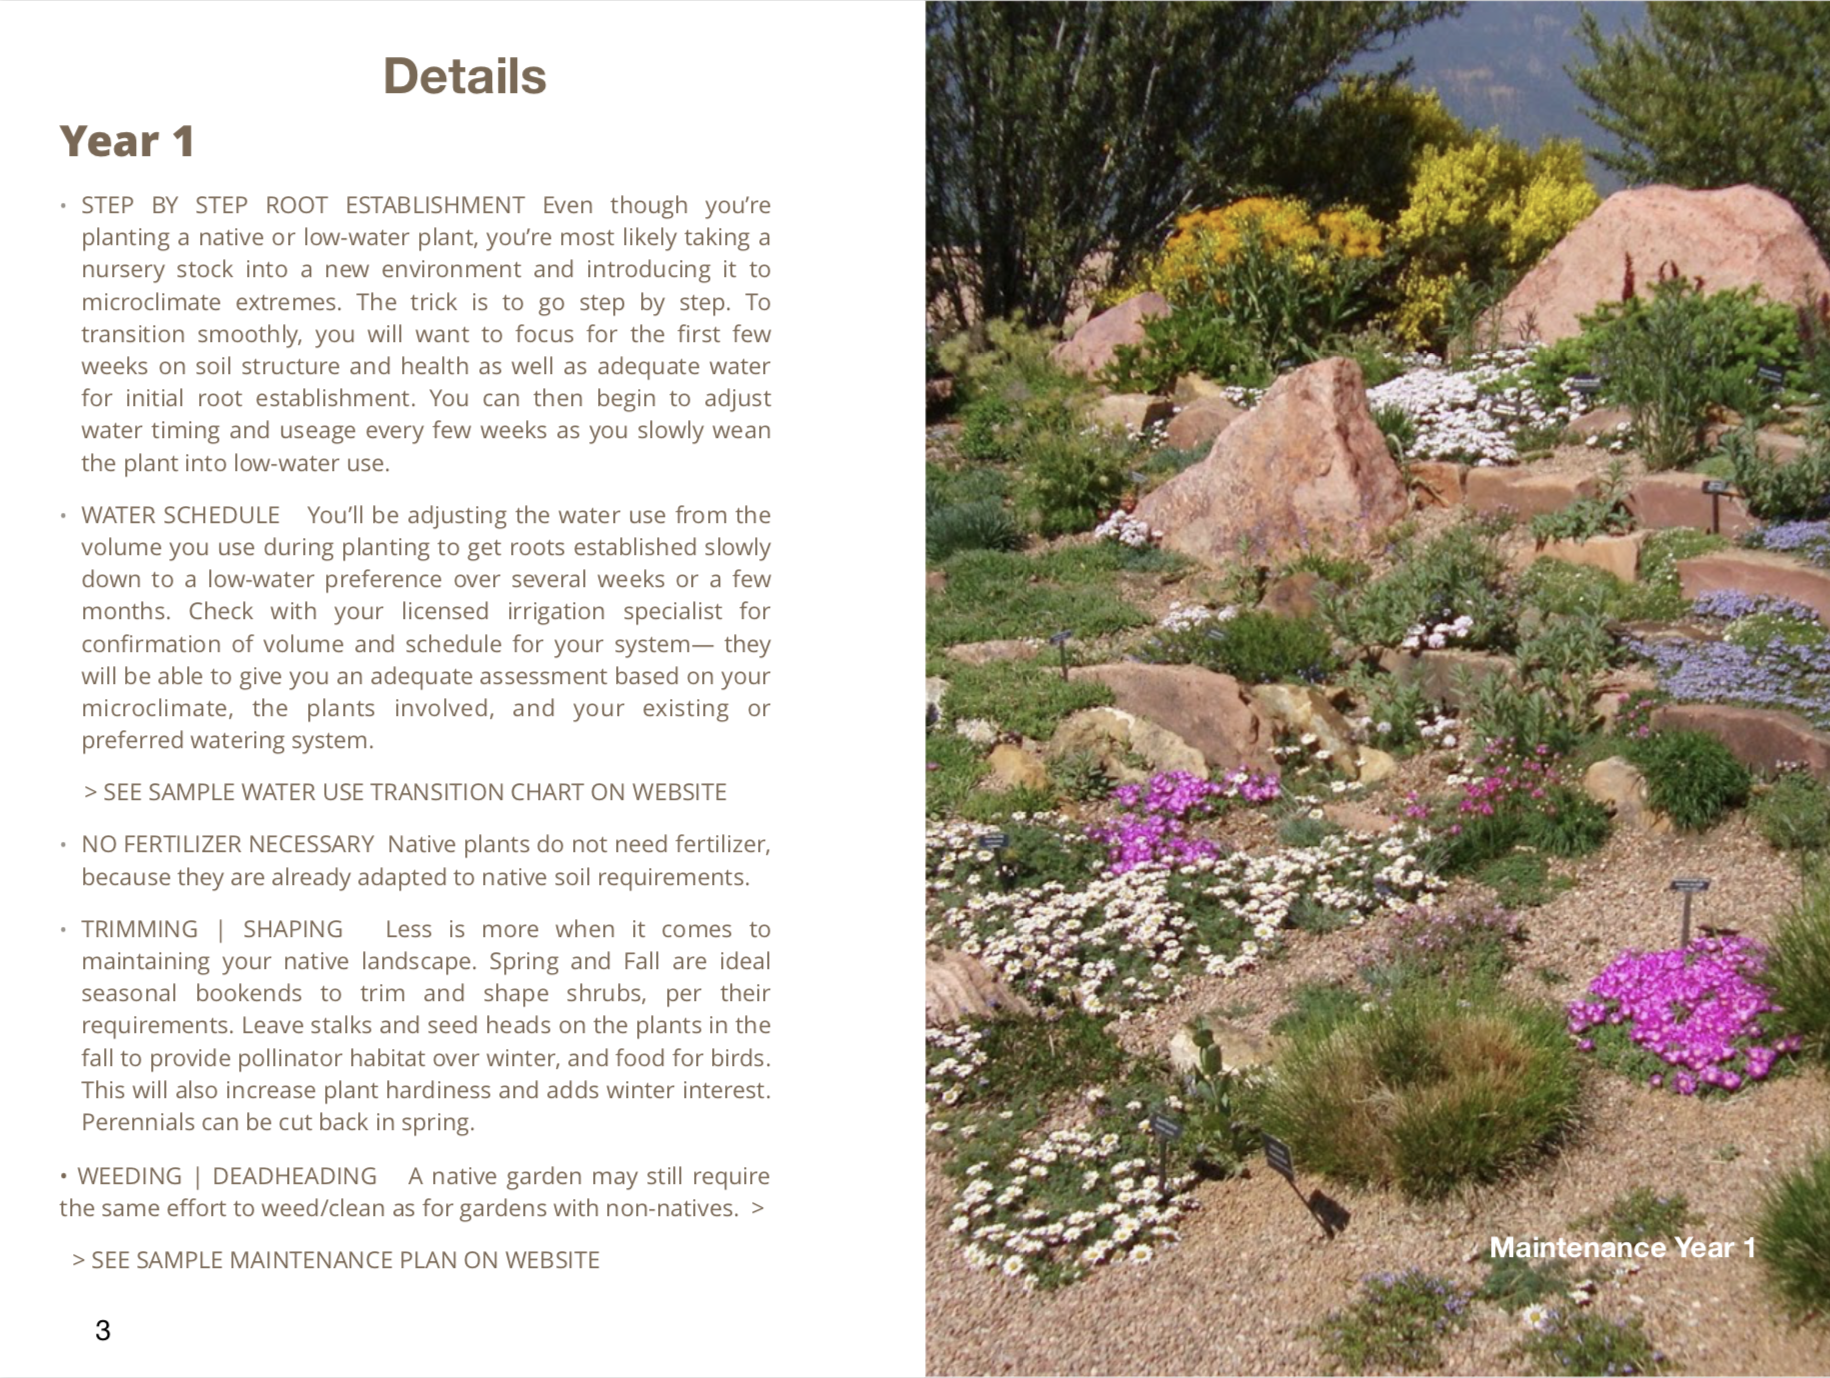
WELCOME! Here’s what to expect of the planning process and how your Garden Plan works. Following your introductory meeting and initial payment, your project is now reserved in our schedule. Within a week of your initial meet, you are now receiving this direct link to your Project Page. This is where information will be made available throughout the evolution of the project and can be accessed easily in one place at any time for easy reference. You will find some initial information already uploaded, to be followed shortly with your design. We will let you know when to check your page for the design once we have uploaded it. Then we will schedule a chat by phone to walk through the page and the design together, and receive feedback. We will make the updates and check in again to make sure you have everything looking good. Then you will be ready to hand the design to your installation team. Easy.
Here are the basics of what you’ll find on this page (and more):
• OVERVIEW | PROJECT PLANNING This section in included to help give a sense of what’s involved from start to finish, how to plan in the correct sequence, and a basic understanding of what and who is typically involved for a project like this. You may also find suggestions for groundwork or prep to the yard that would be helpful to attend to or that would affect your plants or design before installation proper begins. We are helpfully equipping you with a basic run through that is just good to know, acknowledging that the direction and decisions are ultimately your choice.
• YOUR LANDSCAPE PLAN = 2D DESIGN LAYOUT + DESIGNATED AREA CONCEPTS This section includes a conceptual design for designated area/s and a recommended materials list. Your conceptual design will show the materials, and the overall look and feel of the area to give you a visualization for how the area could look. It is not intended as a final plan, rather a guide at this stage.
• RECOMMENDED MATERIALS This section is broken out in to two areas: Softscape (mulch, soil, plants) and/or Hardscape (stone, patio, walkway, wood, etc) materials that would be required or that would optionally fit the goals of the design are offered for consideration. This is also where you will find specific details on any area of your yard in question, from stone or fencing choices to ‘what to do with’ a certain area, or even products, strategies, comparisons, or anything helpful.
• ADDITIONAL MATERIAL RECOMMENDATIONS, should you wish to autonomously research and make adjustments or additions to the initial recommended material list.
• HELPFUL RESOURCES How-To videos, or additional relevant information / inspiration directly related to specific elements of your project, as well as additional design references as deemed useful.
• RECOMMENDED VENDORS + CONTRACTORS We offer recommendations for where to find quality materials and for the experience necessary to create the look and feel herein suggested. This section gives referrals but we are not directly affiliated with those listed and cannot guarantee their performance. Please know that you will be required to give any design concept to a licensed specialist or to your landscape installation team for actual review of viability and a separate estimate. We are not responsible for determining actual requirements for implementation; we leave it to them where it will be in good hands with their expertise.
• BEFORE + AFTER photo album. Pics of your current yard will be included, aka, the before. Once your project is installed, please send us some great pics (or invite us over to take a great pic) and we’ll upload it to showcase the beautiful transformation of your yard, aka, the after. If you like, let us know and we can give you a single image of your before/after to show friends or family.

• ADDITIONAL PLANT RECOMMENDATIONS, should you wish to autonomously research and make adjustments or additions to the initial recommended plant list.
• RECOMMENDED GARDEN IRRIGATION We offer experienced quality recommendations to give a general sense of what might be needed or what would work best, but we are not a licensed irrigation technician so you will be required to give any recommendation to a licensed irrigation specialist or to your landscape installation team for actual review of viability and confirmation as we are not responsible for determining actual requirements or implementation; we leave it to them where it will be in good hands with their expertise.
• HELPFUL RESOURCES How-To videos, or video information / inspiration directly related to specific elements of your project, local plant and material vendors, trusted service suppliers, additional design references, and helpful references or exciting classes related to continuing garden learning and care.
• BEFORE + AFTER photo album. Pics of your current yard will be included, aka, the before. Once your project is installed, please send us some great pics (or invite us over to take a great pic) and we’ll upload it to showcase the beautiful transformation of your yard, aka, the after. If you like, let us know and we can give you a single image of your before/after to show friends or family.
Project Planning
BENEFITS OF PLANNING
Buildings, Walkways, + Structures: If you are including built features such as a fence, deck, or using right-of-way space, you will in most circumstances need to reach out to a licensed structural engineer or architect. They will be able to provide you with the certification that you will use to apply to the city for a permit approval for your project. If you need to define your property boundaries (for a built structure), a site survey is most helpful. If you need to mitigate drainage or are making improvements to a walk, drive, or public use structure, a civil engineer may be most helpful and a ‘right-of-way’ permit may be required.
Landscapes + Plantings: No permits necessary. If you are creating the aesthetic look and feel or seek to define the ‘use of space’ for or around your built structures, you will be working with a Landscape architect or designer to create a property or planting plan. The benefits of this are without number. You can visually walk through each area spatially, understand the needs of the plants, materials, and microclimate and how it will be best used. Sustainability, soil health, native species, and ecological resilience are the focus.


For all plans, the takeaway is that you will understand the scope and sequence of what needs to happen when throughout the arc of your project. With this bird’s eye view, you’ll be able to schedule or budget any phases for the project and be better informed to address details as they come up from start to finish. Along the way, unknowns can crop up or new questions can arise. Simply knowing how long it takes to implement something, and then adding a buffer of time (and budget) to allow for unknowns, can help with planning and expectations. With your plan, you can check to see if there are any requirements or missing pieces before you start, or double check your preferences and even weigh potential risk factors along the way that could save you from a costly mistake.
Building and Landscape design go hand in hand. For example, it’s just as essential to think about your plants first even during the building design phase, because often the irrigation will need to be installed underneath the walkways or patio, and the needs of the ecology may benefit from or inform the structural plans.
Once you are ready to take action a project typically starts with checking for utilities and underground features, grading the land for water flow and structural requirements, then building or construction begins, followed by landscaping including hard-scape features, the soil is amended, drip irrigation is laid, and finally soft-scape features such as plants, planting soil, and mulch are introduced.
Now that you’re familiar with the benefits of planning, let’s take a look at who you may need to work with in sequence to bring your project into being…
Managing Roles
WHO DOES WHAT
So who does what to make your garden come together?
PROJECT MANAGEMENT
If you are making all the decisions and using various independent service specialists, then you are essentially playing the role of Project Management. If you hire someone for this role, usually a General Contractor or a Project Manager will be assigned to act as the point person for everyone, essentially being the ‘glue’ that holds all the moving pieces of the project, budget goals, communications, and timeline together. If you work with a full service design and landscape company or partnership you will be assigned a project manager to be your point person. Below is a list of typical licensed professionals you may find yourself working with over the course of your project.
Depending on the nature of your project, you may not need to work with every role in the following typical sequence. As you make the best decisions for your needs, we can help guide you to simplify, clarify, and decide on what roles may be required or most effective to work with on your project.

OVERVIEW OF POTENTIAL CONTRACTORS INVOLVED ON A TYPICAL PROJECT
INDEPENDENT LANDSCAPE INSTALLER Each landscape company is unique, based on the combined skills of its team. Many are excellent stoneworkers, and can do irrigation on the side, yet have rudimentary understanding of irrigation, plants, or plant care, even if they offer basic maintenance and clean up. You can ask them what they specialize in and what they would refer to someone else. In terms of project management, a landscape team (installation) usually has a crew manager, responsible for the team’s deliverables. This person may or may not also inadvertently be willing to play a portion of the project management role, depending on the situation. They may also subcontract a part of what’s needed, say plumbing or machine work. Any team’s capacity is usually within the limits of their expertise, meaning they can’t foresee, advise, or plan integrations beyond what they have a current working knowledge of. It’s best to get second opinions to be sure you have all the necessary information and can take the best approach. If you would like a referral, please ask.
INDEPENDENT IRRIGATION SPECIALIST Depending on the needs of your environment or the existing irrigation system, you can either rely on a landscape team’s ability to work with basic irrigation, or you may truly benefit from an irrigation specialist’s wisdom and experience to help you troubleshoot, recommend, or install the required system to sustain your planned environment. Plants form systems and it follows that the irrigation requirements will vary from trees to lawn to various garden plantings, to xeriscape. It’s helpful to have a specialist who can recommend what’s best for all needs, make it easy for you to manage, cost effective, and who can make plans that address future potential access too. If you would like a referral, please ask.
INDEPENDENT TREE SPECIALIST Trees are a world of their own and provide innumerable foundational benefits to the health and character of the land and everything on it. It is highly recommended to work with a tree specialist for specific issues, or maintaining their healthy throughout their life cycles and seasonal extremes. If you would like a referral, please ask.
INDEPENDENT GARDEN SPECIALIST Since, for example, a landscape installation team may specialize in hardscaping, but may not include plant expertise, it is advantageous to invite an independent Garden Specialist or horticulturist to help address things like the right plant list for your microclimate, or to provide other helpful information about how various elements, including irrigation, may best work together to sustain your end goals. They can also highlight what maintenance might be required after the installation process is complete or recommend a specialist.
Rebecca’s Gardens offers this expertise as part of your landscape plan anyway so you save.
FULL SERVICE LANDSCAPE COMPANY WITH ALL ROLES ON AN IN-HOUSE TEAM If your project and budget would be best served by delegating these roles, then the most logical and more integrated option s to contract with a full-service landscape business. They can offer you a well-planned experience, starting with a project manager to be your point person and to interface with on all areas of your plan, schedule, budget, and design. They provide value through an integrated team of specialists that covers all the bases (hardscape, softscape, and irrigation) including helpful risk assessment, and a more seamless experience due to their in-house communication and timeline. With an initial investment up front, working with a full service team is designed to bring you the best experience and recommendations which translates to real savings throughout the project as well as in the long run.
Ok, now that you have an idea of the benefits and scope of planning — Let’s See Your Design!
Front Yard Design

DETAIL


Plant List Images
√ See what your plants will look like when mature.
√ View our PLANT PACKAGES for more inspiration or to add selections to your garden later.

ZONES OF FOCUS
FRONT CORNER

GOAL To define a native landscape within the front range microclimate using sustainable xeriscape principles and minimal water usage, in alignment with the general requirements suitable to the Northern Water demonstration values.
The following approaches will fulfill this goal:
MATERIALS + DEFINITION
Use a sheet-mulch application over winter to compost existing sod. Come spring, introduce designated areas of mulch and rock per design. Smaller rock will follow a 2-3’ border along the sidewalk. A swath of mulch will define the interior. The remaining space will be filled with differently sized cobble. Decorative boulders will be intentionally placed throughout the design. Define the interior space with two gentle rise berms.
PLANTINGS
Ground cover will accent the small rock area bordering the sidewalk. In the interior, a few islands of native pants gathered around decorative boulders or shrubs will add definition to the natural spatiousness. Center, and corners of the design will be anchored by a grass or shrub for visual balance. Taller shrubs and grasses will create a backdrop.
SEASONAL LAYOUT
Seasonal blooms burst forth throughout the progression of the design: starting with bright spring blooms, transitioning into full summer abundance, then gently fading into stunning fall colors and lovely winter interest from grasses, seed pods, evergreen species and decorative rock. The spatial layout is intimate enough to consider it a single watering zone and arrange low water plants appropriately throughout the design. Clusters of groundcovers and perennials define the borders while larger swaths of blooming shrubs and yucca stand out next to locally sourced boulders amidst the natural placement of rock and mulch. Native grasses and taller shrubs anchor the corners and create a nice changing visual backdrop.
SIDE YARD

TOPOGRAPHY
Low Berm Placement
Adding a low gentle berm or two to the overall ‘ley of the land’ adds interest as well as creates a more naturalistic look and feel for a high altitude native landscape. Berms can also help create swales, for directing water to plant roots.
Here are the main features:
• ONE CENTRAL RISE within the mulched area roughly one foot high (for 2 ft) at the apex and sloping on the sides out to 6-8 ft L x 3-4 ft W. This creates a focal point of interest at the center of the landscape and gently channels water to the plants at the edge.
• ONE FRONT RISE within the rocked area, defining the corner of the front drive and the main feature— the large decorative boulder. The area here is roughly the length of the front yard, approximately one foot at the apex, again, (for 6-8 ft) then gently sloping on all sides to create a gentle rise for definition and function.
Implementation
We recommend excavating a small 6” deep swale about 2ft in width loosely around the edges of the berm areas (except the swath between the sidewalk/drive and the front swale) and begin to pile the dirt in the center of what will become the rise. Additional topsoil will be delivered to create the full rise. This can easily be accomplished with pick axes or spades by hand.
Passive Water Use
Rainwater or snowmelt will collect off the boulders and feed the native plants placed adjacent. Groundwater from weather or drip irrigation will gently channel water to the plants along the base of the berm. Careful placement and use of small swales along the top will keep moisture for featured plants on the rise.


SOFTSCAPE
METHODS + MATERIALS
SOFTSCAPE refers to SOIL, PLANTS + MULCH — Basically any of the living organic matter or plants that make up the landscape, that are not the structural rock or hard materials used.

WHAT IS SHEET MULCHING ?
This natural method of composting in existing garden areas, also known as lasagna layering or sheet composting, involves putting down layers of compost, cardboard or newspaper and mulch directly over your lawn (with no need for sod removal). When layered correctly, this method creates a decomposition process which turns the grass, leaves, compost and other elements into a rich fortified soil for future plantings.
BENEFITS
• Natural Process, no chemicals
• No sod removal necessary (uses existing lawn as part of the layering)
• You can begin some shorter plantings right in the mulch layers on top of the cardboard before the entire process is complete. Roots will easily move through the decomposing soft wet cardboard.
CONSIDERATIONS
• Depending on the materials used, amount of rain or hand watering, and how persistent your grass lawn is, it will take a few months to a full season for the grass to disappear and the decomposition process to work its magic. For your backyard, if done in sections, it may take as little as 3-6 months or up to a year.
• For some, the look and feel of the area being sheet mulched may not appear as aesthetically pleasing during this time
THE METHOD
1) Measure Your Garden Area-To-Be
The first step is to measure your new garden bed space and estimate how much coverage you will need. You will need to overlap each cardboard sheet by several inches to ensure no light gets through. Note that any lawn showing at the end of the project will come right back. While one cardboard layer will work, if you have enough, two layers of cardboard works well.

2) Acquire (large) sheets of plain brown cardboard, such as from packing or moving boxes. REMOVE ALL = Tape, Stickers, Staples, Excessive Colored Ink, Glossy printed cardboards. The tape, stickers, and most colored inks use chemicals that don’t belong in your garden. Cut open and flatten the boxes to create single sheets of cardboard for use.
WHERE TO FIND CARDBOARD BOXES = Fed Ex, U-Haul, Local shops, Packages You Receive, Your Neighbors, Dumpsters
3) Prepare the Lawn / Garden-Area-To-Be:
Mow the lawn and leave the grass clippings for (that green layer of) Nitrogen
4) Add Cardboard
Lay down a first layer of cardboard. Place cardboard on the freshly mowed grass, overlapping each piece by 6-8 inches to prevent sunlight getting through. Then add your crushed leaves and/or compost of choice
Water cardboard until damp, not drenched.
5) Add your Nitrogen layer
Think Green / alive = Compost, well rotted manure, or fresh grass clippings
You’ll do best to use approximately 2-6-inches of some combination of compost, manure, or grass clippings—whatever your outdoor plants will like.
6) Add your Carbon layer
Think Brown / dry = Leaves, sawdust, small wood chips or gorilla hair mulch
If you’d like to do 2 layers of the above sequence, then just repeat. Start with another layer of cardboard on top of the compost, then another layer of Nitrogen (green) like grass clippings or compost, and another layer of carbon (brown) like leaves or saw dust.
TIPS + TIMING
This soil calculator can tell you how much compost you may need based on the size of your new bed.
You can hold cardboard in place with landscape pins or rocks.
Each week, make sure everything is snug in place. Water the area as needed during dry spells.
At this point you may choose to plant your ground covers or smaller flowers right in the mulch layer on top of the cardboard.
When the cardboard has vanished and the grass is gone, top up the new garden bed with compost or amendments as needed and resume planting as desired.
Building Soil
SOIL STRUCTURE + AMENDMENTS
The health of your plants is first and foremost about the health of your soil.
After spring clean up, and before adding seeds or starts, it is highly recommend to:
1) OPTIONALLY Aerate or till the existing raised bed soil. In a raised bed specifically designated for use as a vegetable garden, it can be difficult to apply a no-till practice. In this case, it’s fine to balance structure and provide nutrients by adequately loosening up and amending the soil.
BALANCE YOUR SOIL STRUCTURE WITH THESE ELEMENTS
2) Add a moisture-retaining element such as rice hulls, pearlite, or vermiculite (expanded shale). If you want to support a local reseller, these are available at McGuckins. The volume needed will depend on your square footage as well as any unique microclimate influences of note.
The gardener’s goal here is to create a loamy soil strucure (an equal balance of sand/silt/clay). We’re going for the “goldilock’s zone” of not too heavy, not too light, but just right, with good moisture retention. Here’s how to identify what general soil type you may be working with and now to balance it:
→ DENSE DIRT OR CLAY If you soil is overly dense, compacted, or has a high clay content, you’ll want to lighten it up. For this, you can use rice hulls, pearlite, and/or vermiculite. These elements act to retain moisture by wicking and dispersing, making it available to the roots in a more even distribution over a longer period. Coconut coir and spanghum moss also provide a lighter weight to the surrounding soil media thus aerating and lifting the density.
→ SANDY SOIL If your soil is too sandy or dry dusty silt, water may run through it too fast, or it may not cultivate the density necessary to support the kind of microbial activity that will truly nourish your plant roots. So you’ll want to create more moisture retention and build up the structure slightly. In this situation, coconut coir acts as a fine moisture retention element, or you could use vermiculite for even more retention. Consider removing a % of the existing media and/or adding raised bed soil to bring the structure into balance.
For moisture balance, remember this general rule of thumb: Use rice hulls, coconut coir or perlite when you want better drainage and aeration. Use vermiculite when you want more moisture retention.

What’s Your Starting Soil Type?

Use Amendments To Balance Soil Structure

Here’s What A Healthy Balance Might Look Like


COMPOST + NUTRIENTS
While native plants do NOT need fertilization, it is important to consider the biodiversity necessary in the form of microorganisms that support the native eco-system. If you do choose to add some nourishment or ‘extra life force’, here’s how to build biodiversity or healthy ‘soup’ and structure into your Colorado soil:
COMPOST
3) Add a volume of organic compost suitable for vegetable or medicinal garden use. Start by adding a layer to the top of the exposed soil and then mixing it in. Great composts to use can be anything from Alpaca or Chicken poop from your local farm (make sure it’s not too “hot”), to bagged compost. Here are our recommended bagged planting soil blends, available at local suppliers such as McGuckins:
• The Bomb — Paonia Soil Co
• Sheep ‘n Peat — Earth Essentials
• Ocean Forest — Fox Farm
NOTE: If you’ve already sheet-mulched an area, consider this part already done.
NATIVE BALANCING NUTRIENTS
4) Add nutrients that help plants grow. Your typical fertilizers will have a blend of Nitrogen—Phosphorus—Potassium (N-P-K). Together these provide a spectrum that meets plant needs. You can also add other natural elements such as worm castings, bat guano, fish or kelp emulsion, blood or bone meal. Keep in mind that each of these has their own ratio, so make sure it’s what your plant needs before applying. We recommend the following brands:
• Root | Grow | or Bloom — Age Old Organics
• Hemp Dress — Key To Life
ADD WATER SLOWLY AS YOU MIX YOUR SOILS
5) Slow water. Let the amendments soak down with slow watering (to avoid fast runoff) before planting. Soaking, rather than spraying, will give your soil time to sink in and begin to come to life. Make sure the water soaks deeply down and doesn’t just sit in the top few inches of your soil.
PLANT YOUR SEEDS + STARTS
6) Now your seed and starts are ready to be planted. By nurturing the soil before planting, you increase the success rate of your introduction, robustness, and longevity of your new plants, as well as contribute to a healthier ecosystem.
Optionally: Adjust the Soil Ph
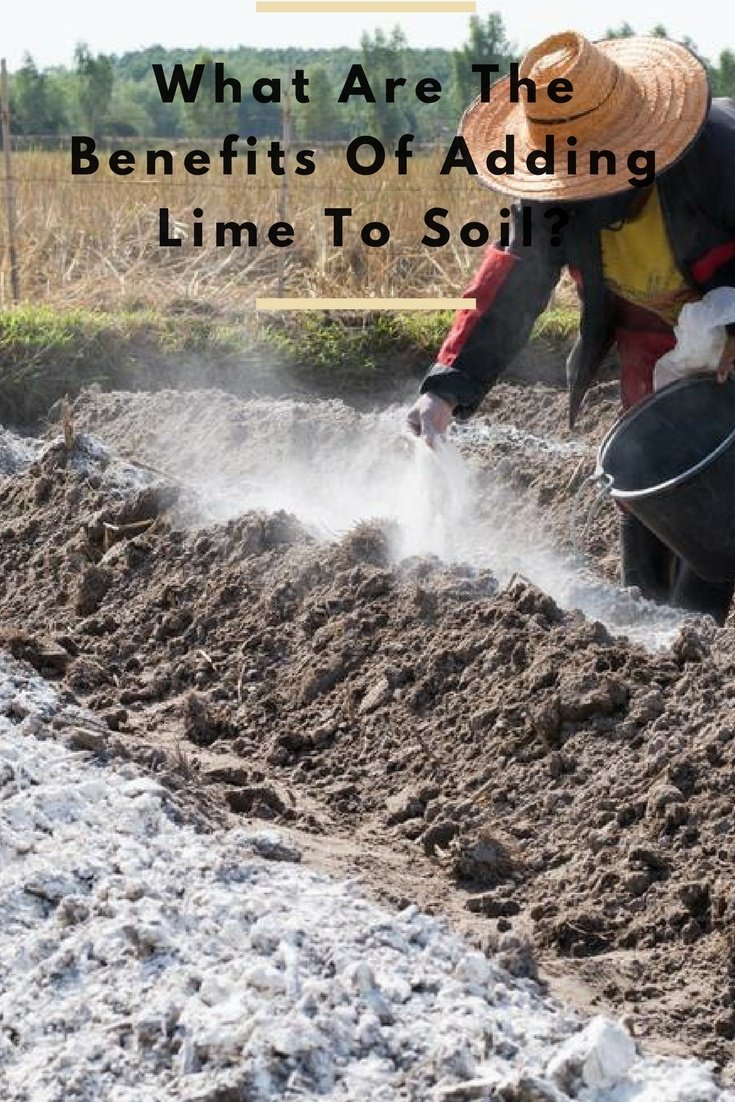
The existing soil may be higher in acidity due to the previous juniper bushes that grew in this garden and other locations around the property for decades before being recently removed. Higher acidity makes the soil a less hospitable environment for most recommended new plantings, even most natives. Therefore, it is recommended to amend the soil in designated areas to decrease the acidity while increasing alkalinity.
One easy way to do this is to add Lime powder. When lime is added to soil, these compounds work to increase the soil's pH, making soil less acidic and more alkaline. Even though lime includes calcium and magnesium, which are essential nutrients for healthy plant growth, it's not a substitute for fertilizer.
The best application of the white lime powder is to loosen the soil in the garden bed 6-8” with a pitchfork and sprinkle the lime in (refer to the product for volume and directions). Then slowly water it in so it soaks in evenly, and doesn’t run off or pool. Then wait a few days for the water to disperse the application before introducing new plants.
When installing new plantings, remember to use a fresh 50-50 or 2-to-1 compost-to-soil ratio and water evenly, thoroughly, and regularly while new plants become established.
USE OF GROUNDCOVER

COLORADO HARDY GROUND COVER AS LAWN ALTERNATIVES
Another option for reducing mulch, is to use living ground cover. Here is a robust list of species-select ground covers to choose from that will work in your garden design. In addition to your NATIVE recommended plants in the design, you can always use this list to try adding a new variety or two to your garden at any time.
Steppable Flowering Groundcovers 2-6” H
→ Mediterranean creeping thyme (Thymus longicaulis)
→ Elfin creeping thyme, multiple species and varieties of Thymus praecox and Thymus serpyllum
→ Wooly thyme (Thymus praecox subs. britannicus)
→ Veronica, creeping, aka speedwell (Veronica filiformis)
Delicate Flowering Groundcovers
1-5” H
→ Adjuga (6”) full to part shade
→ Alpine “Mock” Strawberry (Fragaria vesca)
→ Creeping Jenny (Lysimachia nummularia)
→ Clover (Microclover, Red clover, Crimson clover, White Dutch clover) lifespan 3-5 yrs, requires reseeding
1-5” H cont…
→ English Daisies (Bellis perennis)
→ Lamium (4”) full to part shade
→ Plumbago (6-8”h) sun or shade
→ Redwood Sorrel (Oxalis oregana)
→ Sedum, dragonsblood (Sedum Spurium)
→ Sweet Woodruff (6”h) full to part shade
Delicate Flowering Groundcovers
6-10” H
→ Bugleweed (Ajuga reptans)
→ Lamb’s ear (Stachys byzantina)
→ Phlox, creeping (Phlox stolonifera)
→ Prairie Smoke (Geum Triflorum)
→ Rockcress (Arabis) *wide spread
→Wild Ginger (Asarum canadense)
→ Wintergreen (Gaultheria procumbens)
FLOWERS + SHRUBS
See your Recommended Plant List + Layout above to get an idea of the planting approach. Timing is flexible on when you introduce plants, whether this spring or later in the season. When you give your desired Plant List to your landscaper, they can give you an updated estimate.
NATIVE APPROACH
To the left, you’ll see an alternative option for how to plant any garden area using native low water plants, without a lot of mulch, using broad coverage of low decorative rock, and wide spreading flowers and low shrubs. Let me know if you’d like to see more of this native style in any of your garden beds.

Thyme + Veronica

Clover

Creeping Jenny
viewable up on 4th + hawthorn

False Strawberry
MULCHES


SPRINKLE THIS SOIL CONDITIONER
SOIL PEP — We highly recommend Soil Pep as a top dressing to any horticultural garden in Colorado. This light flaky bark chip mulch can be used underneath heavier top mulches such as ‘gorilla hair’.
Soil Pep is both a mulch and a soil conditioner, meaning it has double value. As water softens, it breaks down and mixes into the existing soil, adding nutrients and helping to bust up existing clay pockets or hardened slightly compacted soil structure. It also is a nice visual top dressing to create an even feel. Keep in mind though, that it is so light weight that the wind will take it if not kept moist. Only for use in horticultural beds, not vegetable.
TOP OFF WITH A NATURAL FIBER MULCH
GORILLA HAIR — Our most recommended type of mulch for the front range is called Gorilla Hair. The gorilla hair mulch allows water through to the roots of surrounding plants and flowers without letting it evaporate too quickly. It is useful in zones with fluctuating temperatures and seasonal extremes for it warms roots in winter and keeps the ground cooler in summer. Because the soil is kept from being exposed, it is assisted in maintaining a healthier structure and moisture level, supporting natural processes beneficial for healthy plant roots. Additionally, the fibers weave together forming a natural mat, preventing wind stripping, when used in sufficient quantity for it to work properly. This mulch typically requires a percent of the total volume to be replaced every other year or so.
TIP: To keep it looking fresh, simply turn or ‘fluff’ the mulch from time to time, or once in the spring.
Recommended For Your Garden Areas as designated:
• Redwood gorilla hair mulch at least 3” deep for any designated garden areas. Volume will typically settle down with weather, snow, and water.
NATURAL WEEDING OPTIONS
Visit the following links to read more or find out DIY tips:


HARDSCAPE
METHODS + MATERIALS
Hardscape refers to THE GRADE OF THE LAND, STONE, + STRUCTURE — Hardscape refers to any hard foundational element that defines your landscape, such as decorative boulders, concrete, or other materials used in walkways, patios, or drives, as well as building materials that define a growing or planting area or around which to work, such as buildings, walls, or other built features.


GARDEN ROCK
River rock, or Cobble, is a type of smoothed river stone that comes in a variety of sizes. The style I envision would work best for your garden design is sold locally by the title of “Grey Rose” in 6-12” or similar. The actual stone sizes in the mix vary from around 4”—15”, but the average stone size is “palm sized”. It has an overall even look, comprised of a range of medium to light tones. For accent areas, you may also consider Mexican River Stones, which are darker in color, smoothly rounded, and of roughly equal size, providing an even continuity and a subtle tone contrast for your garden area. The value is slightly higher than river cobble.
Recommended: Cobble 8-12” “Grey Rose” or similar for any designated rocked garden areas. This style is the most natural with a some color variation.
Vendor: Colorado Materials, Longmont
Optional Use Of Garden Rock
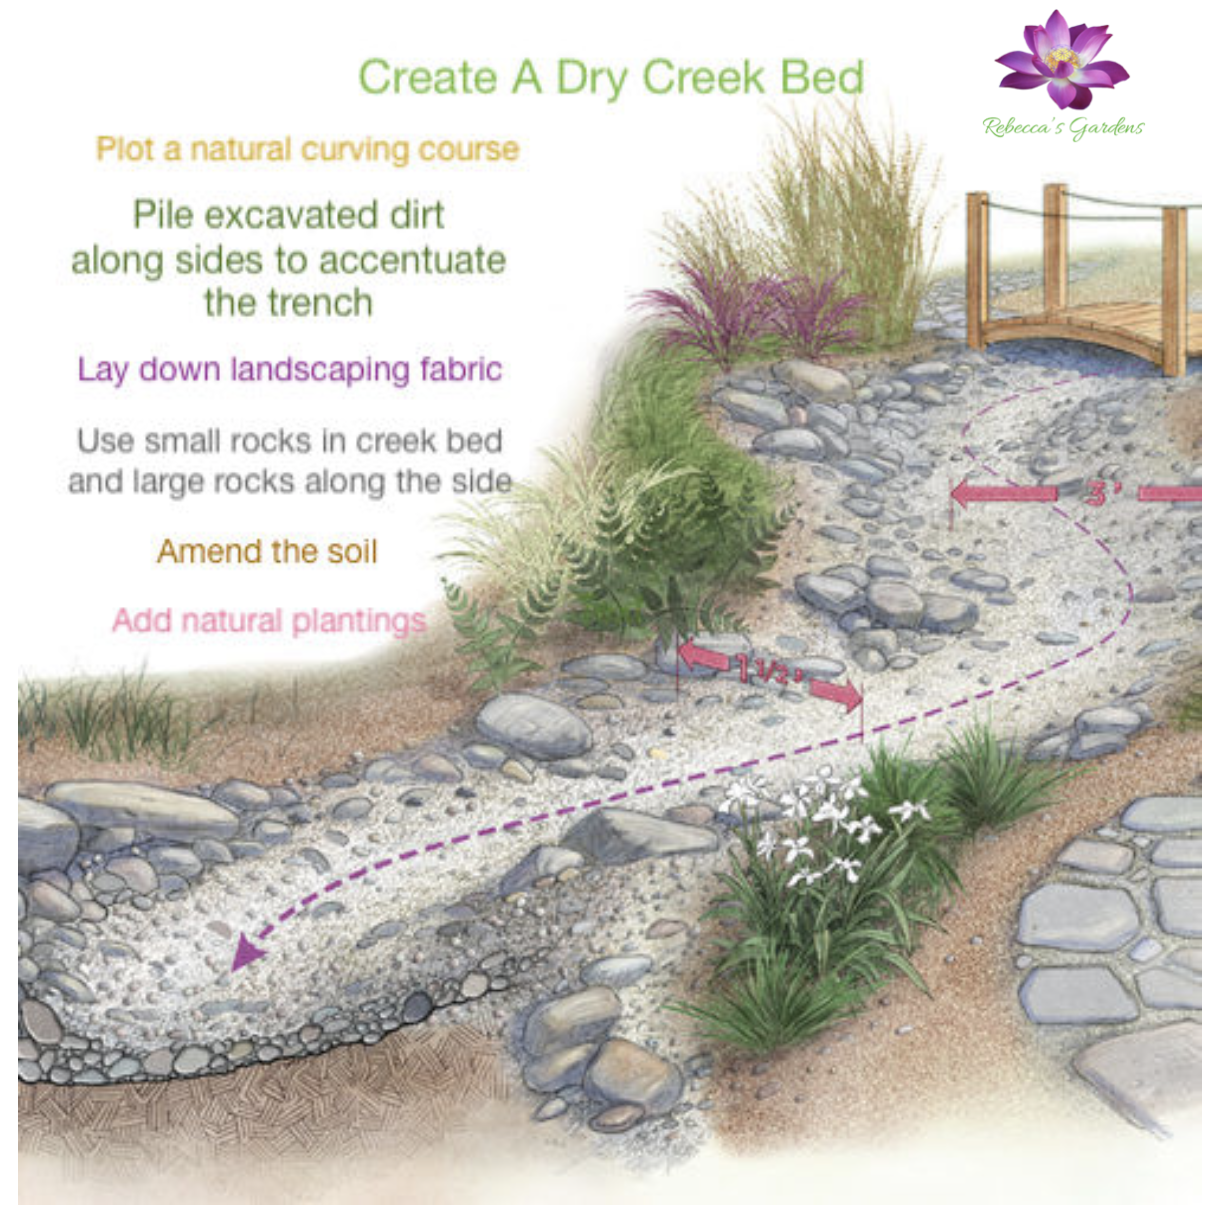
NATURAL DRY CREEK BED LOOK FOR NARROW ROCK FILL AREAS
FEATURE OPTION
Using river stone (cobble) in this section gives you the option to create a dry “Rock Creek” feature running through the landscape.
• Ideally, featured on the inside of the Maple tree in the SW corner
• Choose to make a crescent shape -or- to have it naturally meandering through the landscape as one would see in nature.
• Create a slight topography by piling excavated dirt from the center of the ‘creek’ line, along the sides to accentuate a low wide gentle trench
• Lay down 2x weed fabric over the entire width of the creek and 1x on the sides
• Use smaller rocks in the creek bed and various size larger rocks to define the sides
• Allow plantings to be spaced sporadically along the edges, perhaps next to a decorative larger stone or two.
OPTIONAL GARDEN EDGING
You have existing garden edging. You can choose to keep your existing edging if the new plan does not require removing it. Any pieces of existing edging that are bent, broken, or rusted should be removed for safety and replaced with a new functional piece.
Where additional edging is needed, we always use and like to recommend a ‘roll top’ galvanized steel edging with a powder coated color (we prefer brown) for longevity and safety. bent, broken, or in the way of the new garden line when you begin work.
You do have an aesthetic choice to use River rock (cobble) in a portion of the garden areas, so this type of edging is typically quite helpful when delineating it from the lawn, or from different materials, making the design appear fluid and clean, as well as creating safety by retaining materials within a designated area.
Recommended: Brown galvanized steel “roll top” edging with stakes
Vendor: CPS (Colorado Pipe and Supply) in Arvada
Note: they are wholesale only, but your landscaper should have an account there


CLICK HERE to view our short list of recommended natural products available at local vendors
for horticultural and vegetable gardens
DRIP IRRIGATION
Do my xeric and low water plants need irrigation?
Yes, all newly introduced plants need automated irrigation. This is because they are grown in a nursery and have developed in response to a regular watering system with soft nutrient rich soil in a regulated environment. To become adapted to a new environment they will need time. Start by matching the care they are used to by using regular automated drip, this will help their roots become strong as they become exposed to the new soil conditions and extremes of the environment, then slowly adjust the watering time toward your goals. Doing so in stages over several months or a full season will provide the best curve for successful adaptation with minimal plant loss.
Even if you choose to water by hand, for regularity and efficiently, we highly recommend you consider using a drip system for your front yard design.
When to install? Drip goes in before or at time of plantings. Each plant needs to receive a 1/4” tube with emitter directly to its roots. Situate the tubing above soil and easily accessible yet visually hidden just under mulch or rocked areas.
Basic Irrigation System Requirements:
• Identify a free valve on your manifold + dedicate it as a drip zone
OR Transform your lawn irrigation zone into drip by capping the heads
• You can adjust the drip zone run time/days on the timer/clock
• You can also plan for (or adjust) water flow needs to specific plants using the appropriate volume emitters that will be set to drip at each plant root.
• Make sure the main drip line snakes through the entire yard (to the areas where plantings will be) and around the Maple tree (at the drip line).
• Installation of drip through mulch or rocked areas should visibly hide (not bury) the line just out of sight, and free from excess weight.
We recommend consulting with an irrigation specialist that knows native plants and low water landscape needs for the most efficient solutions.

MAINTENANCE + LOW WATER USE PLAN


KNOW HOW FOR YOUR GARDEN
WE RECOMMEND THE FOLLOWING CHANNELS AS YOU LEARN THE ART(S) OF
XERIC + LOW WATER GARDEN TIPS
7 PRINCIPLES OF THE XERISCAPE SYSTEM
GROUND COVERS THAT PERFORM
LOW WATER FULL SUN PERENNIAL LIST
HOW TO DIVIDE + TAKE CUTTINGS FROM SEDUM
COLORADO NATIVE PLANTS
Recommended Front Range Growers + Vendors
Thank you for your commitment to sourcing only organically grown plant species, soil, or other products, to stay consistent with the larger-picture holistic values of RG designs. The following non-comprehensive list of local growers and vendors is fairly safe in regard to being organic and non GMO but be sure to ask:


Additional Service Specialists
Recommendations by request. Ask about our trusted referrals for related outdoor services.
INSTALLATION + MAINTENANCE
TREE CARE
Seasonal Classes

Photo Album
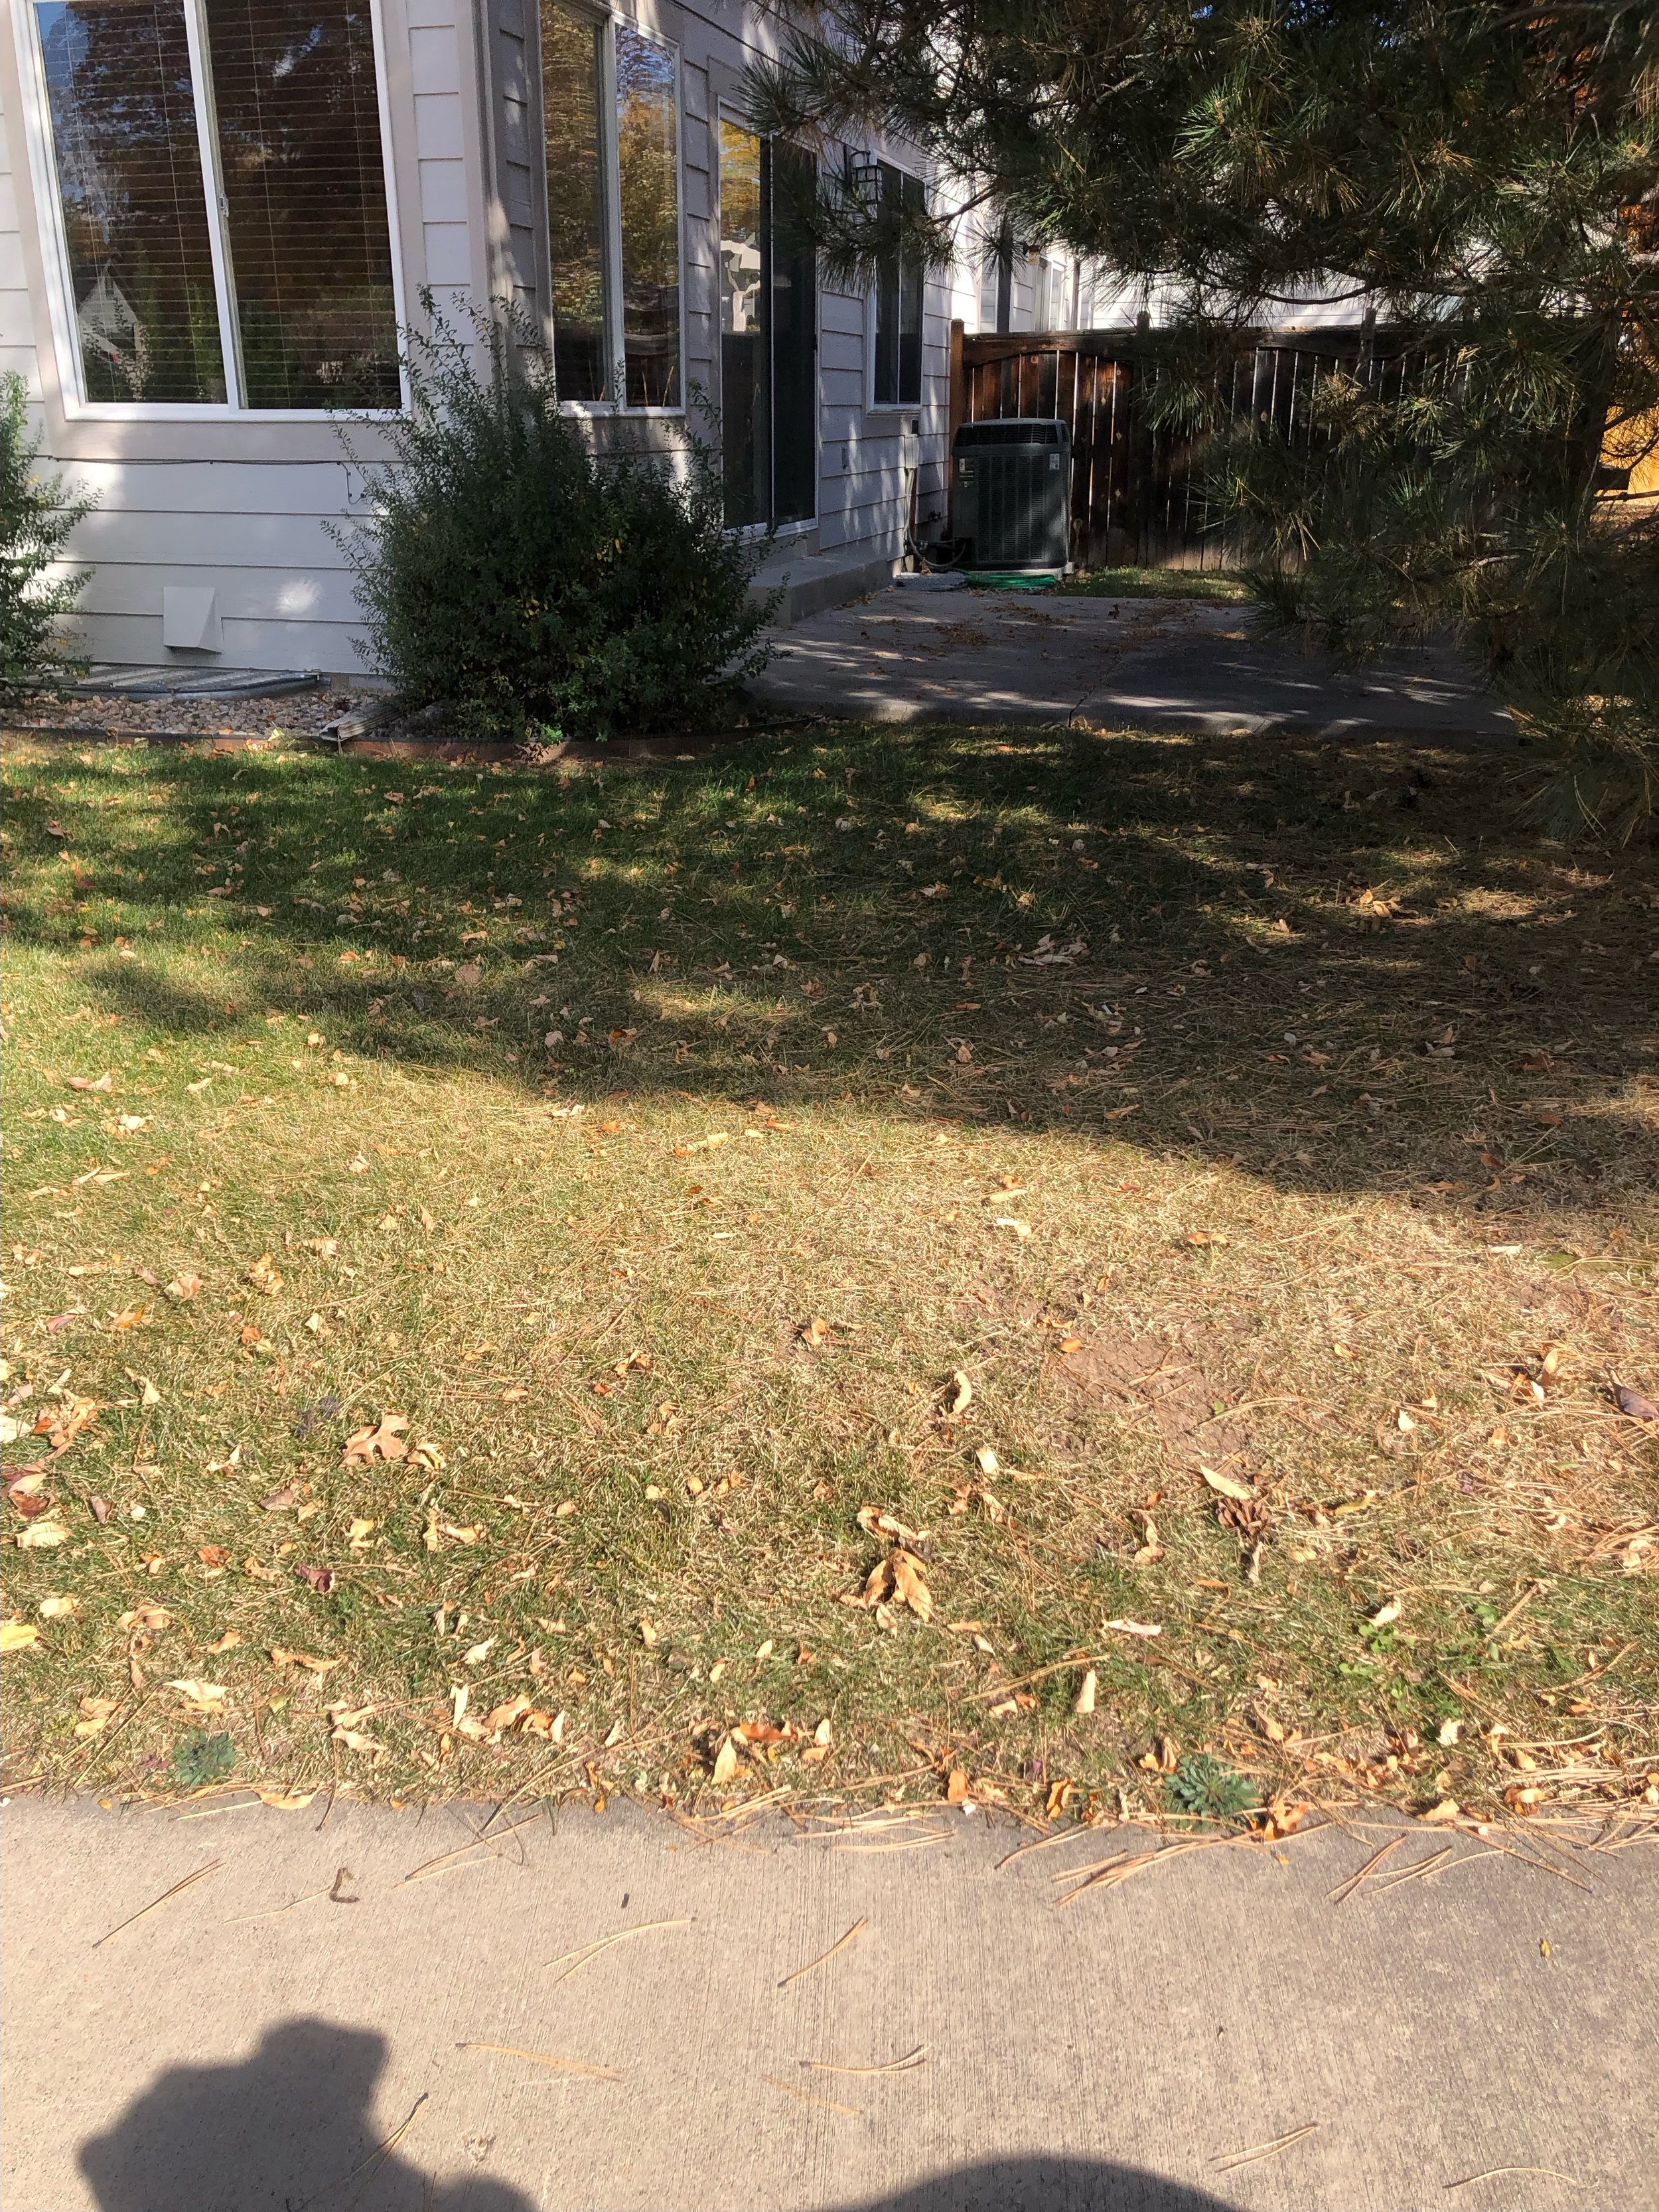
BEFORE

AFTER … TBD

We’re excited to design your Native Landscape demonstration and assist in bringing it to life this coming season! With everyone collaborating on this, may our experience throughout give our hearts and minds room to grow in tune with nature’s cycles, through awareness, abundance, reuse, and reflection. May we learn from mistakes and celebrate our successes. Nature, like life, is a journey… and who we become while achieving our goals is the real treasure. Of course, you know where to reach me if you have any ideas, questions, or could use a spot of inspiration along the way. Enjoy your native landscape!
~ Rebecca & Team
