
2624 Kalmia
Brian’s Landscape Refresh
DESIGN | INSTALLATION | CARE-MAINT | RECOMMENDATIONS | RESOURCES
Full Property Native Design
See Below For Details By Section

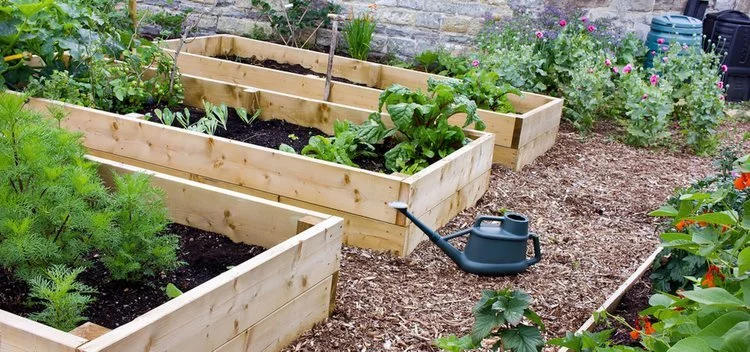
BACK YARD
Design Detail

FRONT YARD
Design Detail

HIGHLIGHTS FOR CULTIVATING THE BEST IN YOUR GARDEN
COMPANION PLANTING
While there are many definitions of what makes a healthy ‘plant guild’, essentially we are looking to create a polyculture by placing species (vegetable, flower, herb) that grow well together, are chemically beneficial for one another, as well as some that attract pollinators and/or some that repel pests.
We’ll give you some of our suggestions for your unique garden. Diversity is key, so play around with your senses — imagine what you’d like to see, smell, taste, or use, or experiment to find what suits your garden best. Here is a link to a good companion plant search, if you get curious about what would grow best with each specific species: https://www.epicgardening.com/?s=companion+plants
TRELLISING
While Boulder is high-and-dry, if you wish to avoid mildew, then trellising your vines is a helpful way to go. On a trellis, the fruits and veggies are easier to see when ripe and to pick. Another creative suggestion might be to create an arched trellis between beds. You can find how-to videos and recommendations for many options below. Be creative and have fun.
MULCHING
STRAW is the best mulch material for your veggie garden. (NOT HAY). Although they may look similar, straw and hay are different in one important feature: Hay, which is grown to feed animals, contains seeds. If used as mulch, these seeds germinate and create a weed problem. A good quality straw contains few seeds. Leaves, ground to a fine consistency can also be sprinkled as a mulch. Make sure any material you use in your edible gardens is either biodynamic or organic and has been grown free from chemicals or chemical fertilizers, including the groundwater in the area.
LIVING MULCH Short green plants like buckwheat, alyssum and clover can be used to cover soil between taller plants and keep weeds from growing, while enriching the soil and attracting beneficial insects. In fact, many of these are prized for their use as lawn alternatives. Check your microclimate requirements and each plant’s growing preference to make sure they will grow where you intend.
TREE BARK Gorilla hair mulch is a hairy type of shredded tree bark widely used as a garden mulch. Depending on your preference for using weed barrier material, this is a good one to use a strip of weed barrier or weed mat under for smaller walkways. This mulch settles down into a matt that is wind resistant and at the same time creates a soft thick layer to walk on that doesn’t allow as many weeds to propagate as gravel.
Wood chips are a fine option for walkways. Do NOT add them as a cover to your veggie gardens, though, as wood and bark can lock in nitrogen from the soil keeping it from the growing plant roots that need it.
Recommended Fruit Tree + Guild
A FOCUS ON BALANCING YOUR GARDEN FOR HEALTH + HAPPINESS
Guild lists courtesy of Rebeccas Gardens for Front Range microclimate species

Guild lists courtesy of Rebeccas Gardens for Front Range microclimate species.
Images courtesy of Introduction to Permaculture by Bill Mollison for spatial layout.

FOR THE FOLLOWING FRUIT TREES — TRY THESE COMPANION PLANT GUILDS
“Brandywine” Crabapple TREE

“Evans Bali” CHERRY TREE

TIPS FOR KEEPING YOUR FRUIT TREE HEALTHY FROM PLANT TALK COLORADO
This link can be an additional free resource. How-To videos, and timely information on your choice of horticultural topics.
Sponsored by Colorado State University Extension, Denver Botanic Gardens, and Green Industries of Colorado.
How Do Plants Work Together?
DEFINITION A plant guild is a community of plants that grow and support each other by recycling nutrients back into the soil, providing shade and conserving water, attracting beneficial insects, repelling pests and diseases, building soil, and preventing erosion. In other words, they’re like each other’s best friends helping to share their unique skills and benefit the collective in their little location (aka micro-climate). They each help one another to be their best in the bio-chemistry and ‘social’ environment.
DRIP LINE LAYOUT Main guild plantings are spaced most prominently within the circular area that defines the ‘drip line’ of the tree. The drip line is the area within which rainwater drips down from the trees leaves, forming a circle on the ground around the outer edge of the trees branches, mirrored by its root system underground. Just within the drip line is the area where the roots of the tree will most actively integrate with companion plants. This is because the tips of the roots are the most active and are always located near the drip line, reaching further out as the growth of the tree evolves. Specifically, this is where the tree has the most synapses for interchanges within the soil, including water and nutrient uptake. Additional plantings may fill the space outside the drip line or the space that defines the garden between trees.
Aesthetically, your creativity is primary! But in addition to your garden artistry, here are the logistical components that may help you decide what will go where for the needs of your unique guild or garden:
6 Main Balancing Components To A Guild
√ ATTRACTORS Great for bringing pollinators to the garden! >> Cosmos, Catmint, Sunflowers, Valarian, Sages/Salvias, Zinnias, Snapdragons, fennel, dill, lavender
√ REPELLERS Pest deterrents are a must as well. >> Allium (aka onion-family like Leeks, Chives), Garlic, Oregano, Geraniums, Marigolds, Mums, Daffodills, etc
√ NITROGEN FIXERS The ‘fertilizer’ for your tree, pulling nitrogen into the soil. >> Clover, Vetch, Legumes (clovers, beans, peas, lentils, peas, chickpeas), silverberrry
√ MULCHERS Can be cut and sprinkled around the tree like mulch which helps with water retention and soil protection. >> Comfrey, Vetch, etc, or hay or woodchips.
√ ACCUMULATORS Rejuvenate the soil by pulling up and replenishing nutrients. >> Borage, Comfrey, Chickweed, Yarrow, Nettle, Strawberries, Sorrel, Vetch etc
√ SUPPRESSORS Help suppress weed growth, like ground covers with interwoven root systems. >> Clover, Thyme, Sedum, Strawberries, etc
What Grows Well with Fruit?
FOR EXAMPLE… WE’LL INTRODUCE YOU TO A FEW GUILD STAPLES HERE SO YOU CAN SEE WHAT THEIR SPECIALTY IS IN HELPING BALANCE THE GARDEN.
PLEASE REFER TO YOUR GUILD LISTS ABOVE FOR MORE VARIETY SPECIFIC TO YOUR MICROCLIMATE:
Comfrey – Comfrey roots grow deep into the ground, helping to pull nutrients and minerals from the soil. Because it’s such a vigorous grower, comfrey out competes weeds. Freshly cut comfrey serves as rich, nitrogen-rich mulch. Be sure to plant comfrey where you want it, because once established, it’s probably going to be there for a very long time.
Marigolds – Marigolds attract pollinators, but that’s just the beginning. These cheery plants also discourage nematodes in the soil and a variety of other pests above the soil. Marigolds tend to self-seed, so you may need to plant them only once.
Lupine – Lupine is a member of the legume family and, like all legumes, it fixes nitrogen in the soil. As an added benefit, the beautiful blooms attract several species of butterflies. Other types of legumes, including peas or beans, can provide the same results.
Nasturtiums – Nasturtiums are believed to discourage codling moths, a scourge that can plague several fruit trees, including apples. Plant nasturtiums seeds at the base of trees.
Hyssop – Hyssop is an attractive herb with a bitter aroma that discourages pests. Hyssop makes a great companion plant for all types of fruit, including berries.
Chives – Chives produce pretty blooms that attract bees and other pollinators, but the onion-like smell keeps pests at bay. Garlic provide similar benefits.
Echinacea – Echinacea is a pretty, drought-tolerant daisy cousin. The long taproots loosen the soil and make deep nutrients and moisture more available to fruit trees.
Lavender – Lavender smells great, but the aroma confuses pests and often sends them packing. Rosemary has a similar effect, and both attract pollinators.
Fennel – Fennel is an herb that attracts parasitic wasps, beneficial insects that help control a number of pests. Dill, mint, basil and coriander provide similar effects, and you can also snip a bit of these herb plants for use in the kitchen.
Your Planting Schedule
GENERAL SCHEDULE | EXACT DATES WILL BE SCHEDULED WITH YOU DIRECTLY BY PHONE AND EMAIL
JUNE — Basic Clean up and Project Preparations
JULY — Project Installation + Plantings
AUG-SEPT — basic maintenance performed or recommended By AJ (independently of Rebecca’s Gardens)
Our plants are selected with your microclimate in mind— including sun, soil, and water conditions, species variety, seasonal fruiting or bloom times, companion planting, nitrogen fixers, pollinator attractors, natural pest resistance, aesthetics and overall balance. With over a decade in the industry working on the front range in this high alpine zone, we believe these selections are well suited to bring your garden to life. Planting can be partly intuitive and also counter intuitive. If you have any additional questions, just reach out.
Garden Care

Additional Products + Local Vendors Recommended By Rebeca’s Gardens
for horticultural and vegetable gardens
NATURAL WEEDING OPTIONS
Click the links to read more or find out DIY tips
• Best Applications for Vinegar
Garden Watering
Congratulations! Your plants are now in their new home in your garden with good soil and nutrients and have been “watered in”!
The baton has now been passed to you to to manage their care. You’re more capable than you may at first suspect, and not to worry, we’re here to help.
Start by simply observing how the plants are doing (in their various areas of the garden, aka microclimates) daily, then weekly, keeping in mind what they might need with the weather fluctuations. Adjust the recommended watering schedule accordingly. Experiment, test and resolve, and find your ‘best flow’. Ideally, they should become established just fine.
Basic Watering Schedule To Get Your Plants Established
Hand Watering Together With Automated Irrigation System
1) Week 1: Hand water everything each morning + each evening for the first week.
Weeks 3-4+, then hand water once a day (early mornings are best) 2-3 times a week
FRUIT TREES: For newly planted trees, water approximately 10 gallons per inch of trunk diameter, 2 times a week. So, your tree is about 1.5” in diameter — so you would water it 15 gallons (or 3 five-gallon bucket full) every other day in the morning. IN ADDITION, HAND WATER the top of the rootball (15-20” circle) surrounding the trunk on the mornings in between. Run the hose for a minute or two to give it a drink at the topsoil level, while the deep roots are still moist from the prior soak.
This applies to your existing RedBud as well. It may be taking water from the lawn sprinklers underground, but it helps to add drip emitters around it as well.
For more info on tree watering, here’s a link from the city of boulder for this dry microlimate.
2 How To Hand Water:
• Water at the roots of each plant, as if you are giving each plant a “drink of water”. Holding the hose to the soil at the base of the plant to let it soak down. Stick the hose down as far as it will go into the plant hole (at the edge of the hole/rootball). Use your best discernment as to how much water to give. Watch the water bubble up and soak back in. Better to err on the side of slightly overwatering than underwatering for the first few weeks.
• Wet the mulch when watering to assist in moisture retention and cooling the roots and layers below.
• Test The Soil With Your Fingers: The soil should stay moist for longer periods under the mulch. The mulch acts as an insulator, retaining moisture better and keeping the soil cooler during the heat of the day and warmer during the cool of the nights (spring/fall/winter).
3) Once your automated system is set up, then you can reduce your hand watering to supplemental mid-day if/as needed.
Automated Schedule
4) Weeks 1-4: Have your irrigation specialist program your automated watering schedule to run twice a day (morning and eve) for a short time. Try starting with 15 mins at 5 am (or just after the lawn schedule), and 10 mins again in the evening say at 9 or 10pm after the sunlight has faded. Adjust up or down as needed. Extra water is required for plants to become well established.
5) Weeks 4-8 (2nd month): Adjust your automated zone run time down by a few minutes if/as possible. This may also be weather dependent, and you may choose to do this later in the summer.
6) ~Week 8 onward: Keep it at its existing schedule if it is working. Alternatively, at some point you may experiment by adjusting the zone run time to once a day for 20-25 mins or so, 3 days a week. This option demonstrates more of a “soak and dry” schedule, which is suitable for our high altitude microclimate. Observe the plants closesly and determine whether this method is good for all or most of them in general. If not, you can always return to the twice a day schedule.
Your Irrigation Specialist
Owner / Lead Manager: HUMBERTO NIETE
(303) 774 - 1234

Important Note: We recommend that both the property owner and the independent irrigation specialist work together independently during and after initial installation and/or when making any decision regarding irrigation or water management. Always green light your inquiry or decisions with a licensed irrigation specialist before implementation. Rebecca’s Gardens is not responsible for any recommendation, execution, or result of any irrigation or water related issues. Zone and map information is our best guess reflecting general knowledge available at the time and should be understood to be a starting point only, and a given that it will evolve and change. Thank you.
IRRIGATION ZONES + RUN TIMES
ZONE 1 — FRONT DRIP in mulch
ZONE 2 — FRONT sprinklers in mulch
ZONE 3 — BACK DRIP in mulch
ZONE 4 — PERIMETER DRIP (FRONT + BACK) in cobble areas
(zones 5 and 6 not assigned)
25 min
5-10 min
25 min
25 min
—n/a—
IRRIGATION MAP
FRONT YARD


BACK YARD


FAQs
Q: Is the plant getting enough water, or too much?
A: Check on how well the soil is holding moisture, and add water OR reduce water accordingly -- hint: it will be slightly different for each area.
When plants go in the ground, they require more water to help their roots become established in the new terrain, than they will require later on. Giving more water now will save you water later, once the plant is hardy and happy and has been slowly weaned of water over time. For now, imagine that they have been ‘babied’ at the plant nursery, given the softest soil, regular water, care and attention as they grow, always around others of their own species, etc. It is a very sheltered and nurturing environment. Now, they are ‘flying the next’ so to speak, and are exposed to less nutrient dense, more rugged native soil, other species, less attention, and extreme temps which are different than what they’re used to. Your best approach is to pay attention and learn how to observe what they need, and to make small incremental changes to their watering schedule over time, as you slowly introduce them to a less water intensive life. Most of the species here are designed to thrive in this native environment with its harsh extremes. However, the native plants that grow in the wild have grown up that way and fended for themselves. These native cultivars have been raised in a nursery and need to be adjusted to fend for themselves. Nurturing them now can allow you to lessen their need for attention or water later.
Q: Is Hand Watering necessary, if I have an automated drip system? If so, when?
A: Yes, hand watering is essential at the beginning to supplement your automated system.
A simple analogy here might be feeding a pet or a baby, while they have regular feeding times, you may notice they need feeding at other times until their system can function well on the more regular schedule. In other words, it’s okay to ‘baby’ your plants as their roots become more established. Pay special attention to the smaller flowers in the planters or anything in a raised bed where the top couple inches of soil can dry out in a hot sunny windy afternoon.
Tips On Adjusting Water Schedule
Zone Run Times
HERB BED ADJUSTMENTS
The herb bed may require more or less water than the rest of your garden. So if it is on the same Zone as your main backyard garden beds, pay attention to how it’s doing and know your options for choosing an appropriate adjustment if necessary. The herb bed is more above ground, using a different type of mulch, different plants, and diff sun, and so it will have diff watering needs than the plants in the ground.
One solution can be to put it on a different automated irrigation zone. This may require your irrigation specialist to run a separate drip line from the manifold to the herb bed, alongside the existing drip line that already serves the main horticultural beds in the backyard. And name it a new zone (program 5 or something).
PLANTERS
For the planters, they may need much less water than the other garden areas, so it may be best to have them on their own zone. One less expensive way to do that, without adding a separate zone (and running a separate line from the manifold) would be to add a timer to an exterior faucet nozzle, with the drip line running off of that.
If drying out excessively or quickly— try adding mulch to add that protective layer of moisture retention and cooling.
Troubleshooting Tips
DRY TOPSOIL / WET ROOTS
To check the soil- stick your finger down all the way into the soil to see how far down it retains moisture. If it is soaking wet a few inches below the surface, while the surface is drying out, try watering less volume but more often— this allows the top to receive moisture while the lower layers can dry out over time.
Irrigation Disclaimer
Please refer to an independent irrigation specialist for all matters related to watering, irrigation, automated system, zone run times, troubleshooting, or anything else water related on your property. Please note that we are not a licensed irrigation specialist, so please take our recommendations as suggestions only. You are welcome to contact us with questions to help assess or find a potential solution as needed. Thank you for understanding that we cannot be responsible for any water related issues on the property or in regard to the life of the plants as there are simply too many factors that are out of our control. Working with us confirms you understand and agree to this. We give every garden the best start possible based on the information we have at the time, and clients the best information or resources we can to help you on your garden journey.
Automated Irrigation Set Up Options
VIDEO NOTE: This is a good walk through of the various components and functions. You do not need to use PVC pipe by any means; Drip tubing is just as efficient for small gardens and easier to set up.
DRIP IRRIGATION TUBING
You’ll need just two sizes of tubing to set up your drip irrigation system:
• 1-2 rolls of 3/4” main line (polyethylene tubing). This usually comes in 50’ or 100’ rolls. 3/"4” refers to the diameter of the tubing. Smaller size tubing is also used, such as 1/2” or 3/8”. However, 3/4” is standard for a main line, will help regulate your water pressure more efficiently, and is typically more durable and lasts longer.
• 4-6 rolls of 1/4” ‘distribution’ tubing. Also known as ‘spaghetti line’ or ‘soaker hose’, but instead of being the version that is actually made of a mesh that soaks, it has small holes distributed along its length at intervals of 6” or 12” options. We recommend going with the 6” for a small densely planted raised bed, and a 12” is useful for more widely spaced horticultural borders for example.

Building Soil
SOIL STRUCTURE + AMENDMENTS
The health of your plants is first and foremost about the health of your soil.
After spring clean up, and before adding seeds or starts, it is highly recommend to:
1) OPTIONALLY Aerate or till the existing raised bed soil. In a raised bed specifically designated for use as a vegetable garden, it can be difficult to apply a no-till practice. In this case, it’s fine to balance structure and provide nutrients by adequately loosening up and amending the soil.
BALANCE YOUR SOIL STRUCTURE WITH THESE ELEMENTS
2) Add a moisture-retaining element such as rice hulls, pearlite, or vermiculite (expanded shale). If you want to support a local reseller, these are available at McGuckins. The volume needed will depend on your square footage as well as any unique microclimate influences of note.
The gardener’s goal here is to create a loamy soil strucure (an equal balance of sand/silt/clay). We’re going for the “goldilock’s zone” of not too heavy, not too light, but just right, with good moisture retention. Here’s how to identify what general soil type you may be working with and now to balance it:
→ DENSE DIRT OR CLAY If you soil is overly dense, compacted, or has a high clay content, you’ll want to lighten it up. For this, you can use rice hulls, pearlite, and/or vermiculite. These elements act to retain moisture by wicking and dispersing, making it available to the roots in a more even distribution over a longer period. Coconut coir and spanghum moss also provide a lighter weight to the surrounding soil media thus aerating and lifting the density.
→ SANDY SOIL If your soil is too sandy or dry dusty silt, water may run through it too fast, or it may not cultivate the density necessary to support the kind of microbial activity that will truly nourish your plant roots. So you’ll want to create more moisture retention and build up the structure slightly. In this situation, coconut coir acts as a fine moisture retention element, or you could use vermiculite for even more retention. Consider removing a % of the existing media and/or adding raised bed soil to bring the structure into balance.
For moisture balance, remember this general rule of thumb: Use rice hulls, coconut coir or perlite when you want better drainage and aeration. Use vermiculite when you want more moisture retention.


What’s Your Starting Soil Type?

Use Amendments To Balance Soil Structure

Here’s What A Healthy Balance Might Look Like

NEXT FERTILIZE YOUR SOIL WITH
COMPOST + NUTRIENTS
There is a difference between soil and dirt. Dirt can be any media such as sand/silt/clay, but it lacks the living microbes or fungal networks that create the ‘soup’ of life within which plant roots symbiotically thrive. Soil, on the other hand, can have a base of the same media, yet it is ALIVE, providing a living soup for such organisms. Soil has a balanced structure, density, and most importantly: the biodiversity necessary to support a living eco-system thriving within. Here’s how to build biodiversity and healthy structure into your Colorado soil:
COMPOST
3) Add a volume of organic compost suitable for vegetable or medicinal garden use. Start by adding a layer to the top of the exposed soil and then mixing it in. Great composts to use can be anything from Alpaca or Chicken poop from your local farm (make sure it’s not too “hot”), to bagged compost. Here are our recommended bagged planting soil blends, available at local suppliers such as McGuckins:
• The Bomb — Paonia Soil Co
• Sheep ‘n Peat — Earth Essentials
• Ocean Forest — Fox Farm
FERTILIZERS
4) Add nutrients that help plants grow. Your typical fertilizers will have a blend of Nitrogen—Phosphorus—Potassium (N-P-K). Together these provide a spectrum that meets plant needs. You can also add other natural elements such as worm castings, bat guano, fish or kelp emulsion, blood or bone meal. Keep in mind that each of these has their own ratio, so make sure it’s what your plant needs before applying. We recommend the following brands:
• Root | Grow | or Bloom — Age Old Organics
• Hemp Dress — Key To Life
ADD WATER SLOWLY AS YOU MIX YOUR SOILS
5) Slow water. Let the amendments soak down with slow watering (to avoid fast runoff) before planting. Soaking, rather than spraying, will give your soil time to sink in and begin to come to life. Make sure the water soaks deeply down and doesn’t just sit in the top few inches of your soil.
PLANT YOUR SEEDS + STARTS
6) Now your seed and starts are ready to be planted. By nurturing the soil before planting, you increase the success rate of your introduction, robustness, and longevity of your new plants, as well as contribute to a healthier ecosystem.
We Suggest The Following Additional Channels As You Learn The Art/s Of…
Soil
Medicinals Not Weeds
Cultivating Tips
Next Level Beauty + Inspiration
COME VISIT US AT GEOFLOWER FARM IN NORTH BOULDER
For Hands-On DIY Learning Sessions and Seasonal Classes!


Come Practice Gardening + Regenerative Ag With Us
At Geoflower Farm — Details At Our Sign Up Page:
Single Sessions Starting In June:
• GARDENING 101 — SEASONAL OVERVIEW + PRACTICES
ONCE A MONTH FOR 5 MOS MAY — SEPT ON A SATURDAY FOR 3 HRS
“Always more to learn… see you in the garden!”
Our Recommendations For Local Growers + Vendors
Find your seeds or plant starts here, as well as tools, materials, and more! We’re pleased to share the health and the wealth of opportunity among these associations from our many professional and social circles. Rebecca’s Gardens Design makes it our goal to stay as consistent as possible with the larger picture holistic ecological values for plants, people, and our planet. Thank you for your commitment to sourcing biodynamic or organically grown plant species or varieties, soil, or other products.


Recommended Service Specialists
TBD
Your Photo Album
BEFORE VISUAL SKETCH


MARCH … Be sure to take before, during, and after pics so you can record your progress!
PICTURE ALBUM FOR SPRING 2024 GARDEN … TBD

We’re so excited for your gardening journey this season! May your plants and hearts grow in abundance, wisdom, and joy. May you learn from mistakes and celebrate your adventures. Like any good life, gardening is a journey… who we become, what we create, and how we enjoy the process on the way to our goals is the real treasure. So do your best, try something new, and you know where to reach me if you have any questions, or ideas for help along the way. Enjoy!
~ Rebecca
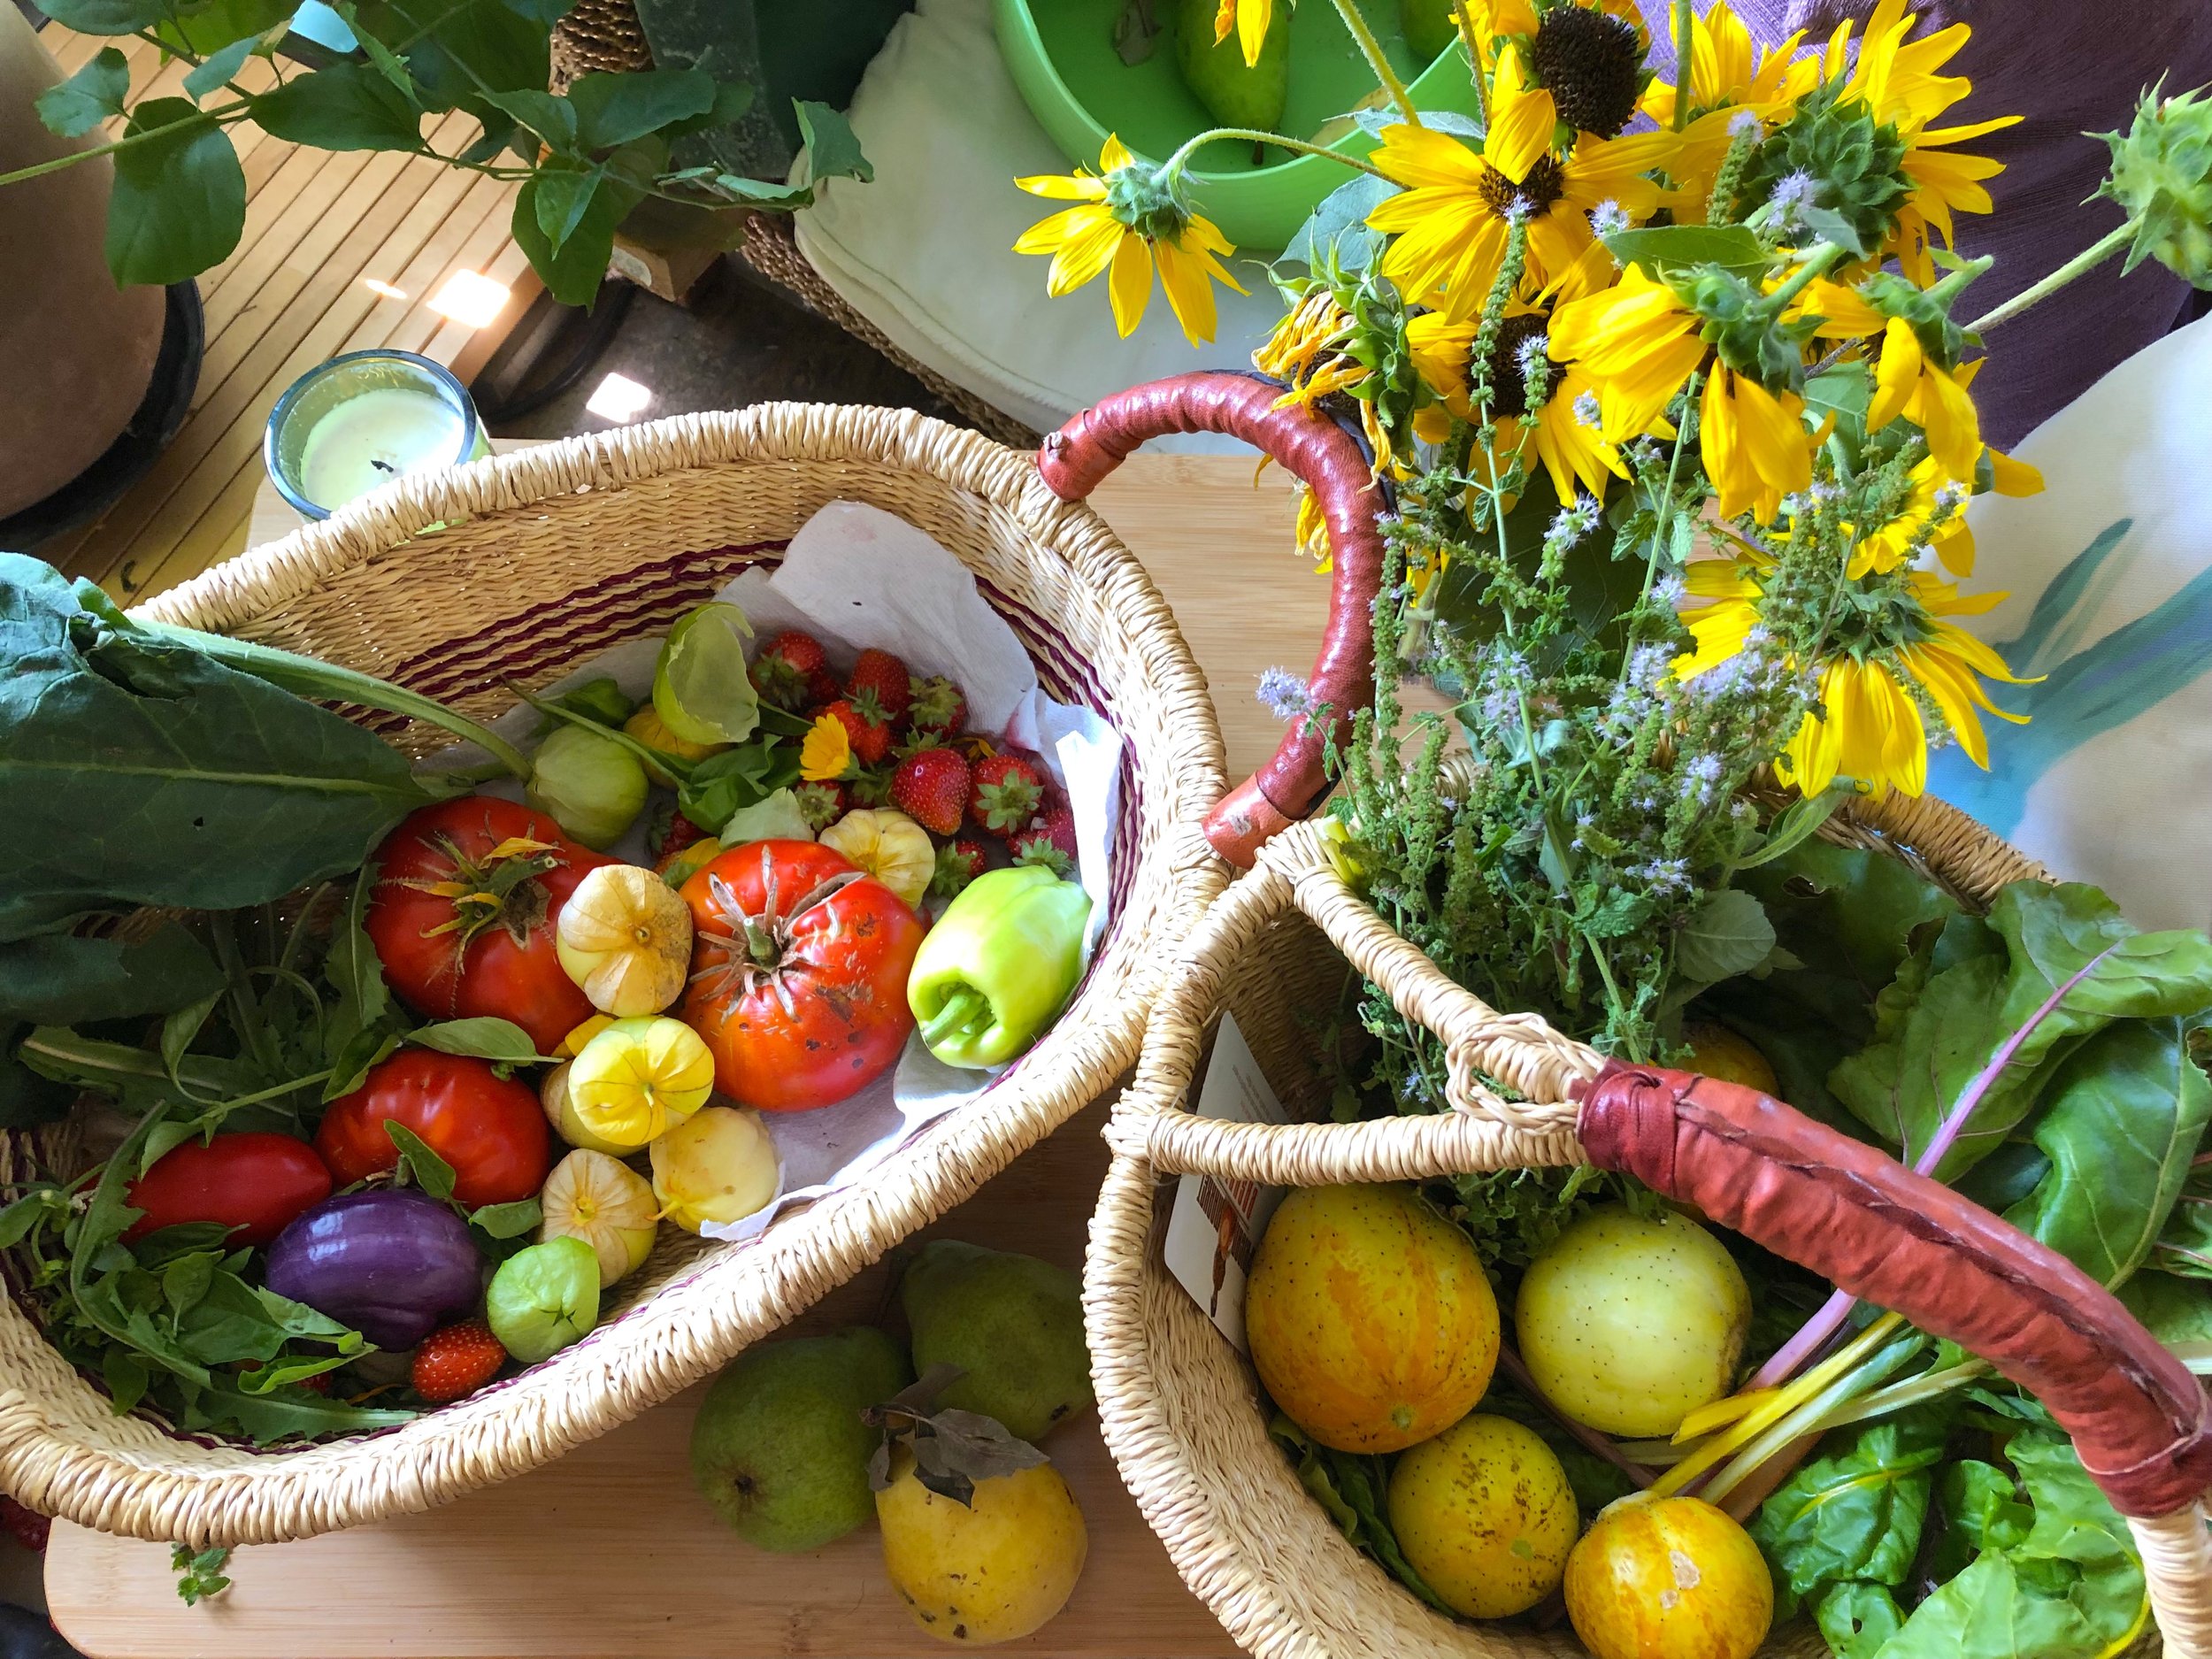
MID - LATE SUMMER - Yay! Harvest Time

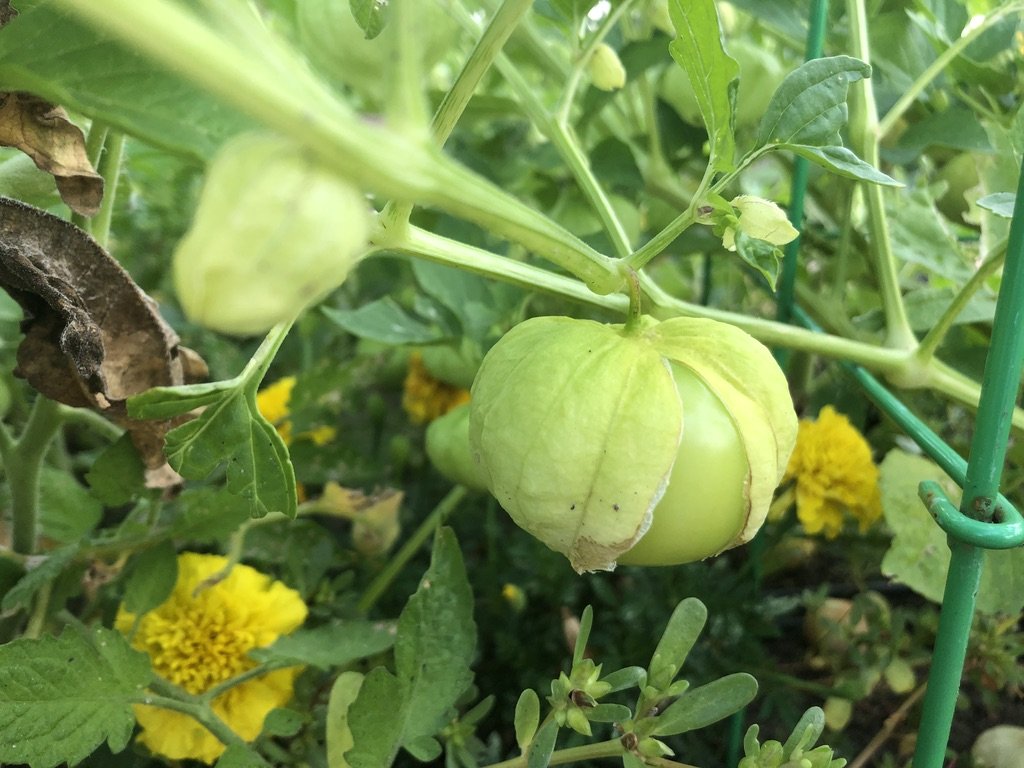
DETAIL - Tasty ground cherries