
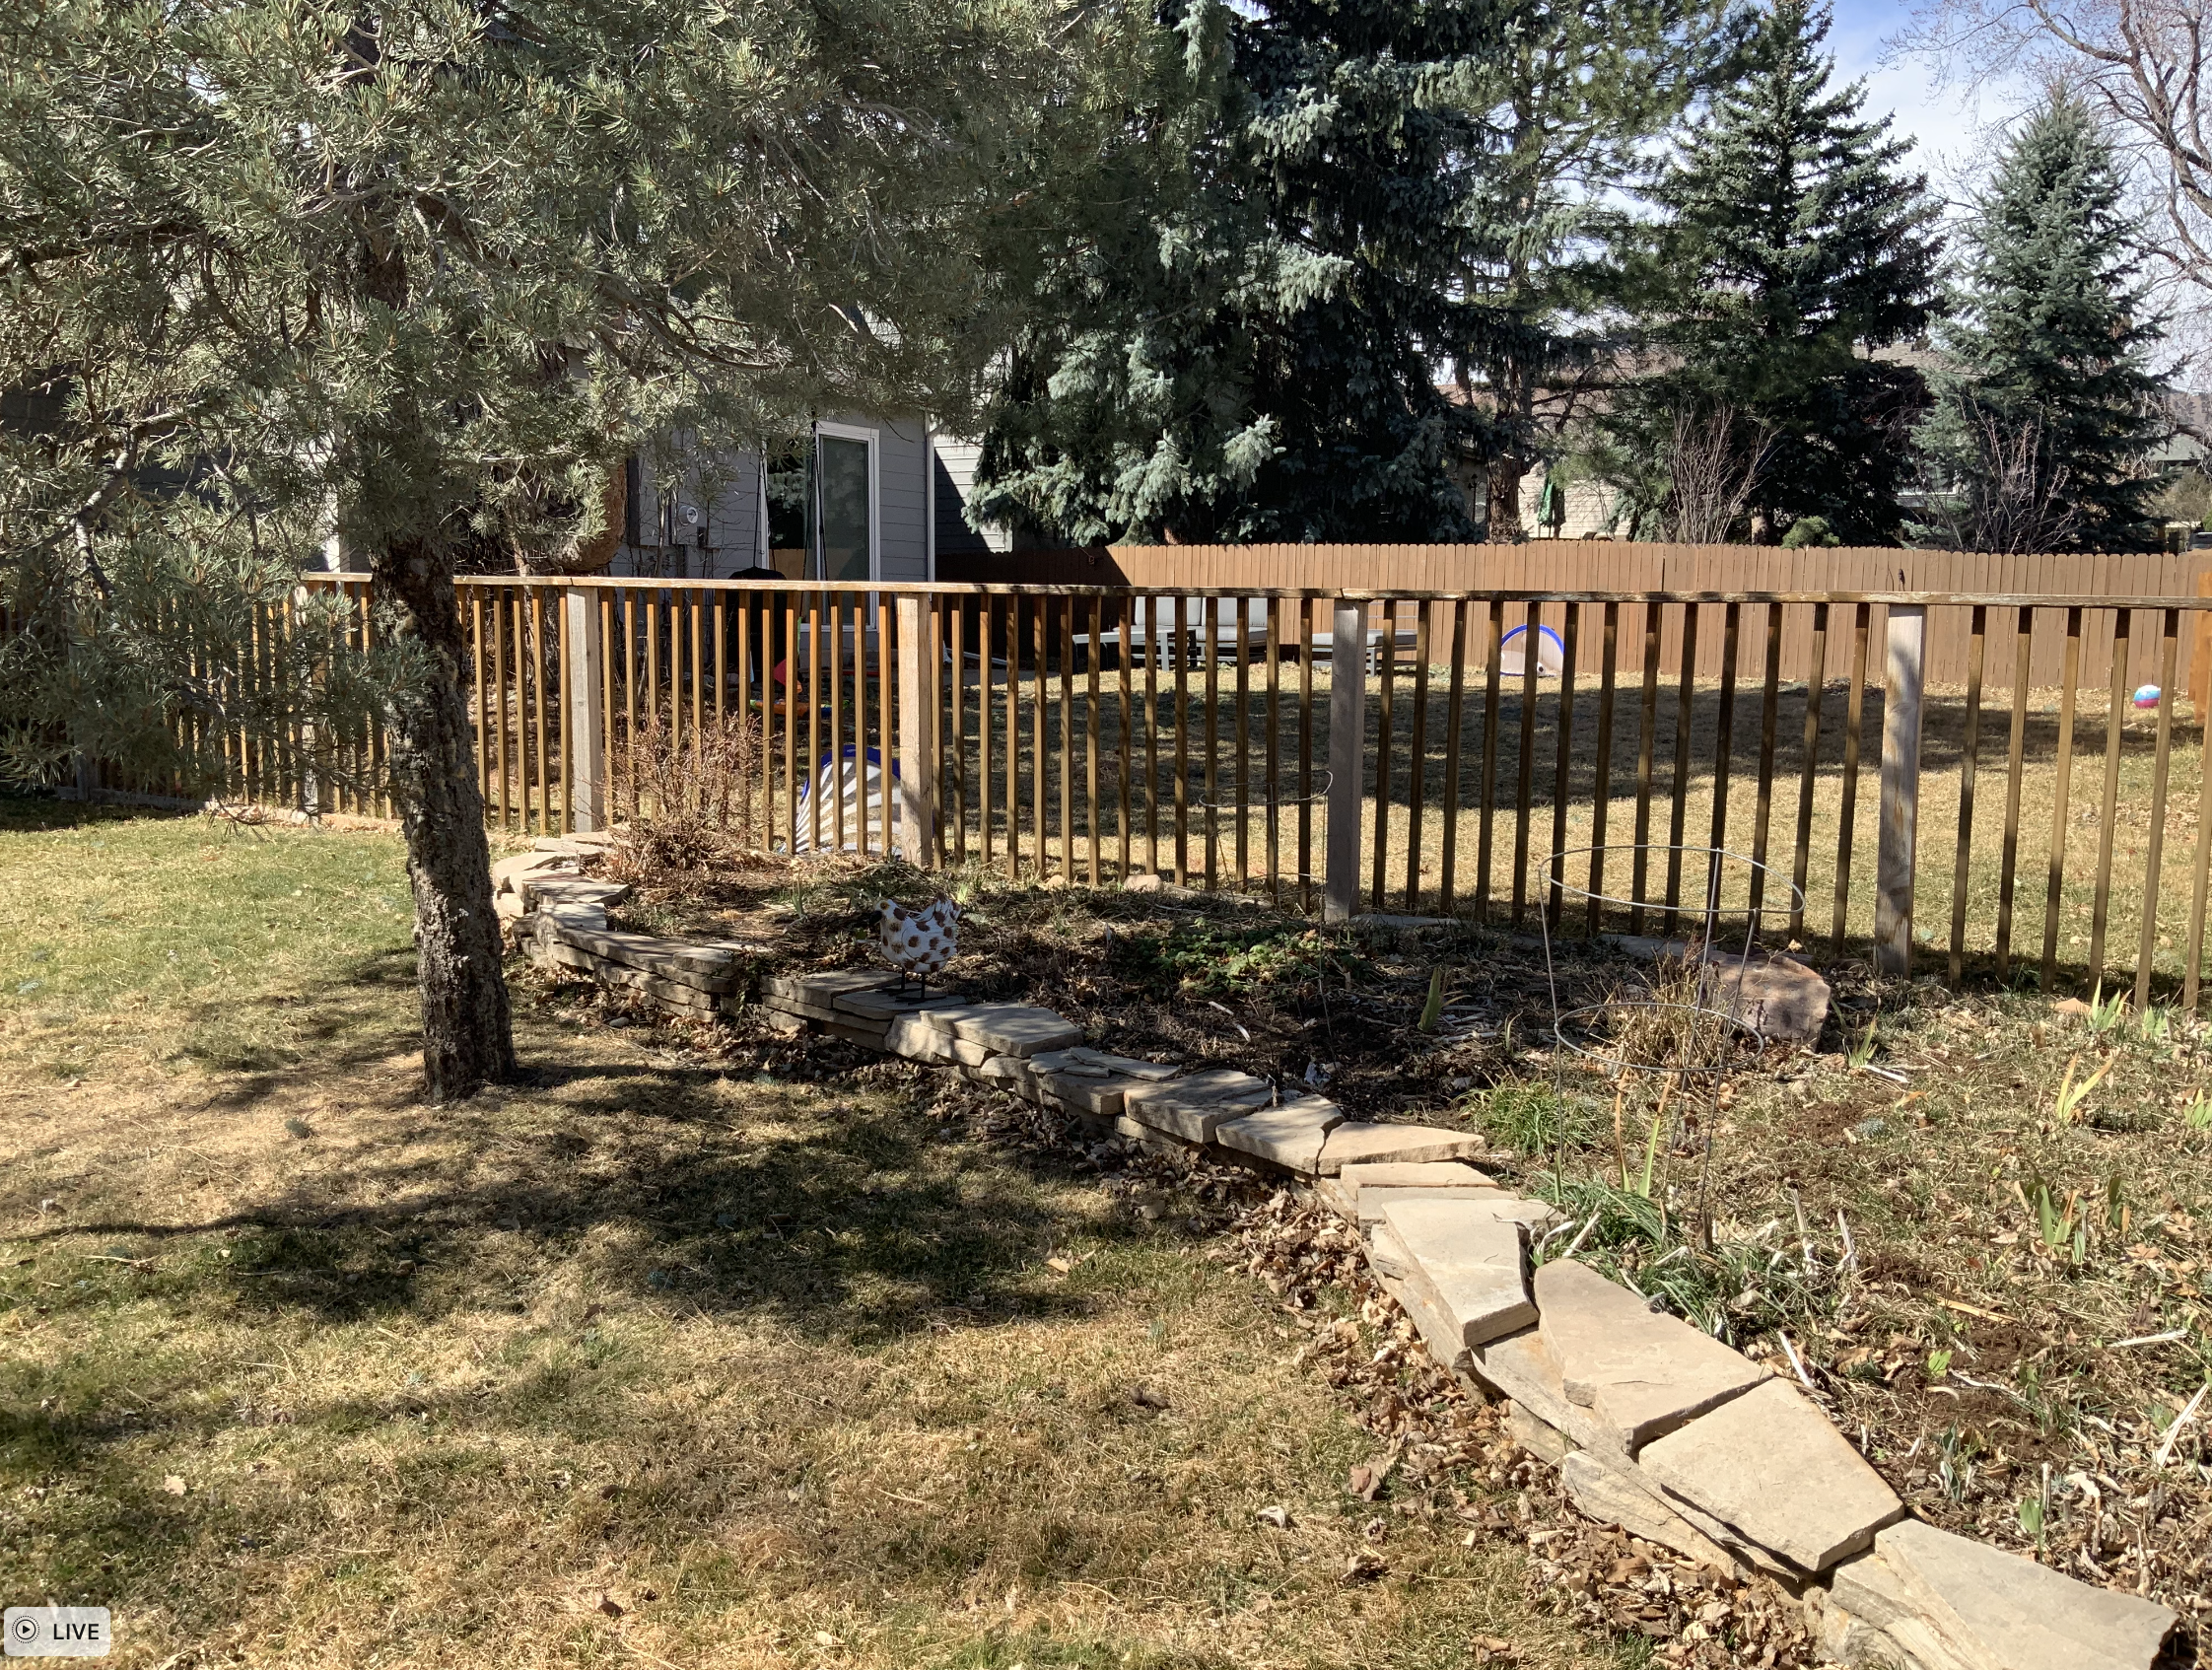
3620 Roundtree Court
Sally’s Landscape Refresh
DESIGN | INSTALLATION | DIY | RECOMMENDATIONS | RESOURCES
Backyard
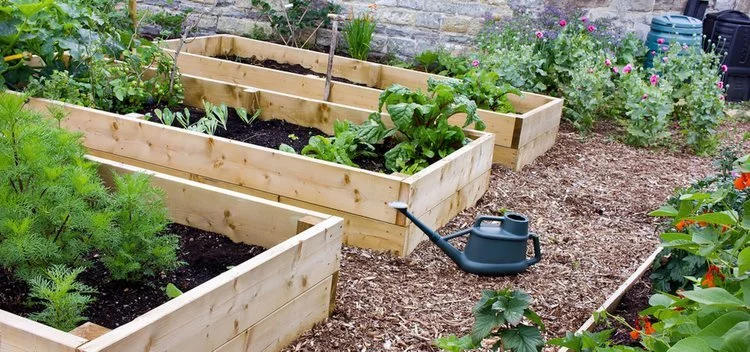
Focus on NW Perennial Garden Design


Plant List - TBD
WITH BOTANICAL NAMES FOR EASY IDENTIFICATION
Plant Guild
for cultivating healthy Aspen Trees

TRY THESE AROUND THE BASE OF YOUR ASPENS + IN BETWEEN
• Wild Geranium
• Bluebells
• Yarrow
• Ferns
• Columbine
• Sedum
• Pineleaf Penstamon
Guild list courtesy of Rebeccas Gardens for Front Range microclimate species
While there isn't a specific, universally recognized "aspen tree guild" in the same way there are guilds for fruit trees or other specific plant types, you can certainly create a plant community that supports aspen trees by understanding their needs and choosing companion plants that benefit them. Here’s how!
Here’s a snapshot of what to think about when creating a beneficial plant community for aspen trees:
Understanding Aspen Needs:
Sunlight: Aspens thrive in full sun and are intolerant of shade.
Moisture: They prefer moist soils.
Soil: Aspens do best in slightly acidic, cool, moist, well drained soil, but can survive in all types of soil conditions.
Pioneer Species: Aspens are aggressive pioneer species that colonize disturbed areas and can persist even when subjected to frequent fires.
Companion Plants for Aspen Trees:
Plants that benefit from similar conditions:
Consider plants that also thrive in full sun and moist soil.
Plants that improve soil health:
Choose plants that can help improve soil structure and fertility, which can benefit the aspen trees.
Plants that provide some shade or wind protection:
While aspens prefer full sun, some plants can provide beneficial shade or wind protection, especially during extreme weather fluctuations on the front range.
Here are some selections for native plants that could be used in your aspen tree guild here in Colorado. We will choose the right ones for your plant list:
Groundcovers: Short groundcovers like thyme, sedum, veronica, creeping jenny, or clover, can help to retain moisture and prevent erosion around the base of the aspen trees. Slightly taller groundcovers that also do well in slightly acidic soil, are Periwinkle (Vinca minor or major), and Japanese Pachysandra.
Native wildflowers: Part sun/part shade perennials like wild geranium, yarrow, creeping phlox, penstamon, bellflower, ferns, or even sedge grasses, are good choices for native plants that can thrive alongside aspen trees and can tolerate slightly acidic soil.
Shrubs: Some smaller shrubs that also do well in slightly acidic soil can be used to help structure the plant guild and cultivate root stability for the aspen trees, like roses, cottoneaster, or waxflower.
Other trees: Consider inter-planting with another tree that can provide complimentary color, dappled shade or wind protection, such as a serviceberry or maple.
What Is A Plant “Guild”? How Do Plants Work Together?
DEFINITION A plant guild is a community of plants that grow and support each other by recycling nutrients back into the soil, providing shade and conserving water, attracting beneficial insects, repelling pests and diseases, building soil, and preventing erosion. In other words, they’re like each other’s best friends helping to share their unique skills and benefit the collective in their little location (aka micro-climate). They each help one another to be their best in the bio-chemistry and ‘social’ environment.
DRIP LINE LAYOUT Main guild plantings are spaced most prominently within the circular area that defines the ‘drip line’ of the tree. The drip line is the area within which rainwater drips down from the trees leaves, forming a circle on the ground around the outer edge of the trees branches, mirrored by its root system underground. Just within the drip line is the area where the roots of the tree will most actively integrate with companion plants. This is because the tips of the roots are the most active and are always located near the drip line, reaching further out as the growth of the tree evolves. Specifically, this is where the tree has the most synapses for interchanges within the soil, including water and nutrient uptake. Additional plantings may fill the space outside the drip line or the space that defines the garden between trees.
Aesthetically, your creativity is primary! But in addition to your garden artistry, here are the logistical components that may help you decide what will go where for the needs of your unique guild or garden:
HIGHLIGHTS FOR CULTIVATING THE BEST IN YOUR GARDEN
COMPANION PLANTING
While there are many definitions of what makes a healthy ‘plant guild’, essentially we are looking to create a polyculture by placing species (flower, herb) that grow well together, are chemically beneficial for one another, as well as some that attract pollinators and/or some that repel pests.
We’ll give you some of our suggestions for your unique garden. Diversity is key, so play around with your senses — imagine what you’d like to see, smell, taste, or use, or experiment to find what suits your garden best. Here is a link to a good companion plant search, if you get curious about what would grow best with each specific species: https://www.epicgardening.com/?s=companion+plants
MULCHING
The importance of covering bare soil is paramount. A good organic material that keeps the moisture in and helps breatheability is essential for healthy soil, especially at high altitudes with extreme weather and low precipitation.
LIVING MULCH Short green plants like buckwheat, thyme, veronica, clover, and others can be used to cover soil between taller plants, or under trees, and can keep weeds from growing, while enriching the soil and attracting beneficial insects. In fact, many of these are also prized for their use as lawn alternatives. Check your microclimate requirements and each plant’s growing preference to make sure they will grow where you intend.
TREE BARK Gorilla hair mulch is ideal for its consistency. It’s a hairy type of shredded tree bark widely used as a garden mulch. Depending on your preference for using weed barrier material. This mulch settles down into a mat that is wind resistant and at the same time creates a soft thick layer to walk on that doesn’t allow as many weeds to propagate.
Wood chips are a fine option around larger shrubs or walkways. But make note: do NOT add them as a cover to your perennial or veggie gardens, as the bark can lock in nitrogen from the soil keeping it from the growing plant roots that need it.
STRAW is the best mulch material for edible herbs or veggie beds. (NOT HAY). Although they may look similar, straw and hay are different in one important feature: Hay, which is grown to feed animals, contains seeds. If used as mulch, these seeds germinate and create a weed problem. A good quality straw contains few seeds. Leaves, ground to a fine consistency can also be sprinkled as a mulch. Make sure any material you use in your edible gardens is either biodynamic or organic and has been grown free from chemicals or chemical fertilizers, including the groundwater in the area.
Our plants are selected with your microclimate in mind— including sun, soil, and water conditions, species variety, seasonal fruiting or bloom times, companion planting, nitrogen fixers, pollinator attractors, natural pest resistance, aesthetics and overall balance. With over a decade in the industry working on the front range in this high alpine zone, we believe these selections are well suited to bring your garden to life. Planting can be partly intuitive and also counter intuitive. If you have any additional questions, just reach out.
Garden Care

Additional Products + Local Vendors Recommended By Rebeca’s Gardens
for horticultural and vegetable gardens
NATURAL WEEDING OPTIONS
Click the links to read more or find out DIY tips
• Best Applications for Vinegar
Garden Watering
Congratulations! Your plants are now in their new home in your garden with good soil and nutrients and have been “watered in”!
The baton has now been passed to you to to manage their care. You’re more capable than you may at first suspect, and not to worry, we’re here to help.
Start by simply observing how the plants are doing (in their various areas of the garden, aka microclimates) daily, then weekly, keeping in mind what they might need with the weather fluctuations. Adjust the recommended watering schedule accordingly. Experiment, test and resolve, and find your ‘best flow’. Ideally, they should become established just fine.
Basic Schedule
Hand Watering Independently or Together With An Automated Irrigation System
TBD - when plant list is confirmed:
1) How To Hand Water
2) Week 1 To Get Established
3) Weeks 2-8 - Important details to look for
FAQs
Q: Is the plant getting enough water, or too much?
A: Check on how well the soil is holding moisture, and add water OR reduce water accordingly -- hint: it will be slightly different for each area.
When plants go in the ground, they require more water to help their roots become established in the new terrain, than they will require later on. Giving more water now will save you water later, once the plant is hardy and happy and has been slowly weaned of water over time. For now, imagine that they have been ‘babied’ at the plant nursery, given the softest soil, regular water, care and attention as they grow, always around others of their own species, etc. It is a very sheltered and nurturing environment. Now, they are ‘flying the next’ so to speak, and are exposed to less nutrient dense, more rugged native soil, other species, less attention, and extreme temps which are different than what they’re used to. Your best approach is to pay attention and learn how to observe what they need, and to make small incremental changes to their watering schedule over time, as you slowly introduce them to a less water intensive life. Most of the species here are designed to thrive in this native environment with its harsh extremes. However, the native plants that grow in the wild have grown up that way and fended for themselves. These native cultivars have been raised in a nursery and need to be adjusted to fend for themselves. Nurturing them now can allow you to lessen their need for attention or water later.
Q: Is Hand Watering necessary, if I have an automated drip system? If so, when?
A: Yes, hand watering is essential at the beginning to supplement your automated system.
A simple analogy here might be feeding a pet or a baby, while they have regular feeding times, you may notice they need feeding at other times until their system can function well on the more regular schedule. In other words, it’s okay to ‘baby’ your plants as their roots become more established. Pay special attention to the smaller flowers in the planters or anything in a raised bed where the top couple inches of soil can dry out in a hot sunny windy afternoon.
Recommended Irrigation Specialist
Owner / Lead Manager: HUMBERTO NIETE
(303) 774 - 1234

Important Note: We recommend that both the property owner and the independent irrigation specialist work together independently during and after initial installation and/or when making any decision regarding irrigation or water management. Always green light your inquiry or decisions with a licensed irrigation specialist before implementation. Rebecca’s Gardens is not responsible for any recommendation, execution, or result of any irrigation or water related issues. Zone and map information is our best guess reflecting general knowledge available at the time and should be understood to be a starting point only, given that it will evolve and change over time. Working with us confirms you understand and agree to this. We give every garden the best start possible based on the information we have at the time, and we give clients the best information or resources available to us that can help you on your garden journey. Thank you.
FYI
Here Are Some Automated Irrigation Set Up Options
VIDEO NOTE: This is a good walk through of the various components and functions. You do not need to use PVC pipe by any means; Drip tubing is just as efficient for small gardens and easier to set up.
DRIP IRRIGATION TUBING
You’ll need just two sizes of tubing to set up your drip irrigation system:
• 1-2 rolls of 3/4” main line (polyethylene tubing). This usually comes in 50’ or 100’ rolls. 3/"4” refers to the diameter of the tubing. Smaller size tubing is also used, such as 1/2” or 3/8”. However, 3/4” is standard for a main line, will help regulate your water pressure more efficiently, and is typically more durable and lasts longer.
• 4-6 rolls of 1/4” ‘distribution’ tubing. Also known as ‘spaghetti line’ or ‘soaker hose’, but instead of being the version that is actually made of a mesh that soaks, it has small holes distributed along its length at intervals of 6” or 12” options. We recommend going with the 6” for a small densely planted raised bed, and a 12” is useful for more widely spaced horticultural borders for example.

How To Build Your Soil
We will be improving the structure and life of your soil to support your plant community. While Rebecca will be applying this wisdom during installation, here are the basics for your general understanding. This information can be of help at any time, especially in changing outdoor environments, in determining best balance.
SOIL STRUCTURE + AMENDMENTS
The health of your plants is first and foremost about the health of your soil.
After spring clean up, and before adding seeds or starts, it is highly recommend to:
1) OPTIONALLY Aerate or till the existing raised bed soil. In a raised bed specifically designated for use as a vegetable garden, it can be difficult to apply a no-till practice. In this case, it’s fine to balance structure and provide nutrients by adequately loosening up and amending the soil.
BALANCE YOUR SOIL STRUCTURE WITH THESE ELEMENTS
2) Add a moisture-retaining element such as rice hulls, pearlite, or vermiculite (expanded shale). If you want to support a local reseller, these are available at McGuckins. The volume needed will depend on your square footage as well as any unique microclimate influences of note.
The gardener’s goal here is to create a loamy soil strucure (an equal balance of sand/silt/clay). We’re going for the “goldilock’s zone” of not too heavy, not too light, but just right, with good moisture retention. Here’s how to identify what general soil type you may be working with and now to balance it:
→ DENSE DIRT OR CLAY If you soil is overly dense, compacted, or has a high clay content, you’ll want to lighten it up. For this, you can use rice hulls, pearlite, and/or vermiculite. These elements act to retain moisture by wicking and dispersing, making it available to the roots in a more even distribution over a longer period. Coconut coir and spanghum moss also provide a lighter weight to the surrounding soil media thus aerating and lifting the density.
→ SANDY SOIL If your soil is too sandy or dry dusty silt, water may run through it too fast, or it may not cultivate the density necessary to support the kind of microbial activity that will truly nourish your plant roots. So you’ll want to create more moisture retention and build up the structure slightly. In this situation, coconut coir acts as a fine moisture retention element, or you could use vermiculite for even more retention. Consider removing a % of the existing media and/or adding raised bed soil to bring the structure into balance.
For moisture balance, remember this general rule of thumb: Use rice hulls, coconut coir or perlite when you want better drainage and aeration. Use vermiculite when you want more moisture retention.


What’s Your Starting Soil Type?

Use Amendments To Balance Soil Structure

Here’s What A Healthy Balance Might Look Like

NEXT FERTILIZE YOUR SOIL WITH
COMPOST + NUTRIENTS
There is a difference between soil and dirt. Dirt can be any media such as sand/silt/clay, but it lacks the living microbes or fungal networks that create the ‘soup’ of life within which plant roots symbiotically thrive. Soil, on the other hand, can have a base of the same media, yet it is ALIVE, providing a living soup for such organisms. Soil has a balanced structure, density, and most importantly: the biodiversity necessary to support a living eco-system thriving within. Here’s how to build biodiversity and healthy structure into your Colorado soil:
COMPOST
3) Add a volume of organic compost suitable for vegetable or medicinal garden use. Start by adding a layer to the top of the exposed soil and then mixing it in. Great composts to use can be anything from Alpaca or Chicken poop from your local farm (make sure it’s not too “hot”), to bagged compost. Here are our recommended bagged planting soil blends, available at local suppliers such as McGuckins:
• The Bomb — Paonia Soil Co
• Sheep ‘n Peat — Earth Essentials
• Ocean Forest — Fox Farm
FERTILIZERS
4) Add nutrients that help plants grow. Your typical fertilizers will have a blend of Nitrogen—Phosphorus—Potassium (N-P-K). Together these provide a spectrum that meets plant needs. You can also add other natural elements such as worm castings, bat guano, fish or kelp emulsion, blood or bone meal. Keep in mind that each of these has their own ratio, so make sure it’s what your plant needs before applying. We recommend the following brands:
• Root | Grow | or Bloom — Age Old Organics
• Hemp Dress — Key To Life
ADD WATER SLOWLY AS YOU MIX YOUR SOILS
5) Slow water. Let the amendments soak down with slow watering (to avoid fast runoff) before planting. Soaking, rather than spraying, will give your soil time to sink in and begin to come to life. Make sure the water soaks deeply down and doesn’t just sit in the top few inches of your soil.
PLANT YOUR SEEDS + STARTS
6) Now your seed and starts are ready to be planted. By nurturing the soil before planting, you increase the success rate of your introduction, robustness, and longevity of your new plants, as well as contribute to a healthier ecosystem.
We Suggest The Following Additional Channels As You Learn The Art/s Of…
Soil
Cultivating Tips
Next Level Beauty + Inspiration
For Hands-On Experience - Join a monthly Seasonal Class!

CLICK FOR MORE DETAILS
Click for more details at our north boulder location @ Geoflower Farm
We Recommend Local Growers + Vendors
Find your seeds or plant starts here, as well as tools, materials, and more! We’re pleased to share the health and the wealth of opportunity among these associations from our many professional and social circles. Rebecca’s Gardens Design makes it our goal to stay as consistent as possible with the larger picture holistic ecological values for plants, people, and our planet. Thank you for your commitment to sourcing biodynamic or organically grown plant species or varieties, soil, or other products.


Your Photo Album
BEFORE


We’re so excited for your gardening journey this season! May your plants and hearts grow in abundance, wisdom, and joy. May you learn from mistakes and celebrate your adventures. Like any good life, gardening is a journey… who we become, what we create, and how we enjoy the process on the way to our goals is the real treasure. So do your best, try something new, and you know where to reach me if you have any questions, or ideas for help along the way. Enjoy!
~ Rebecca
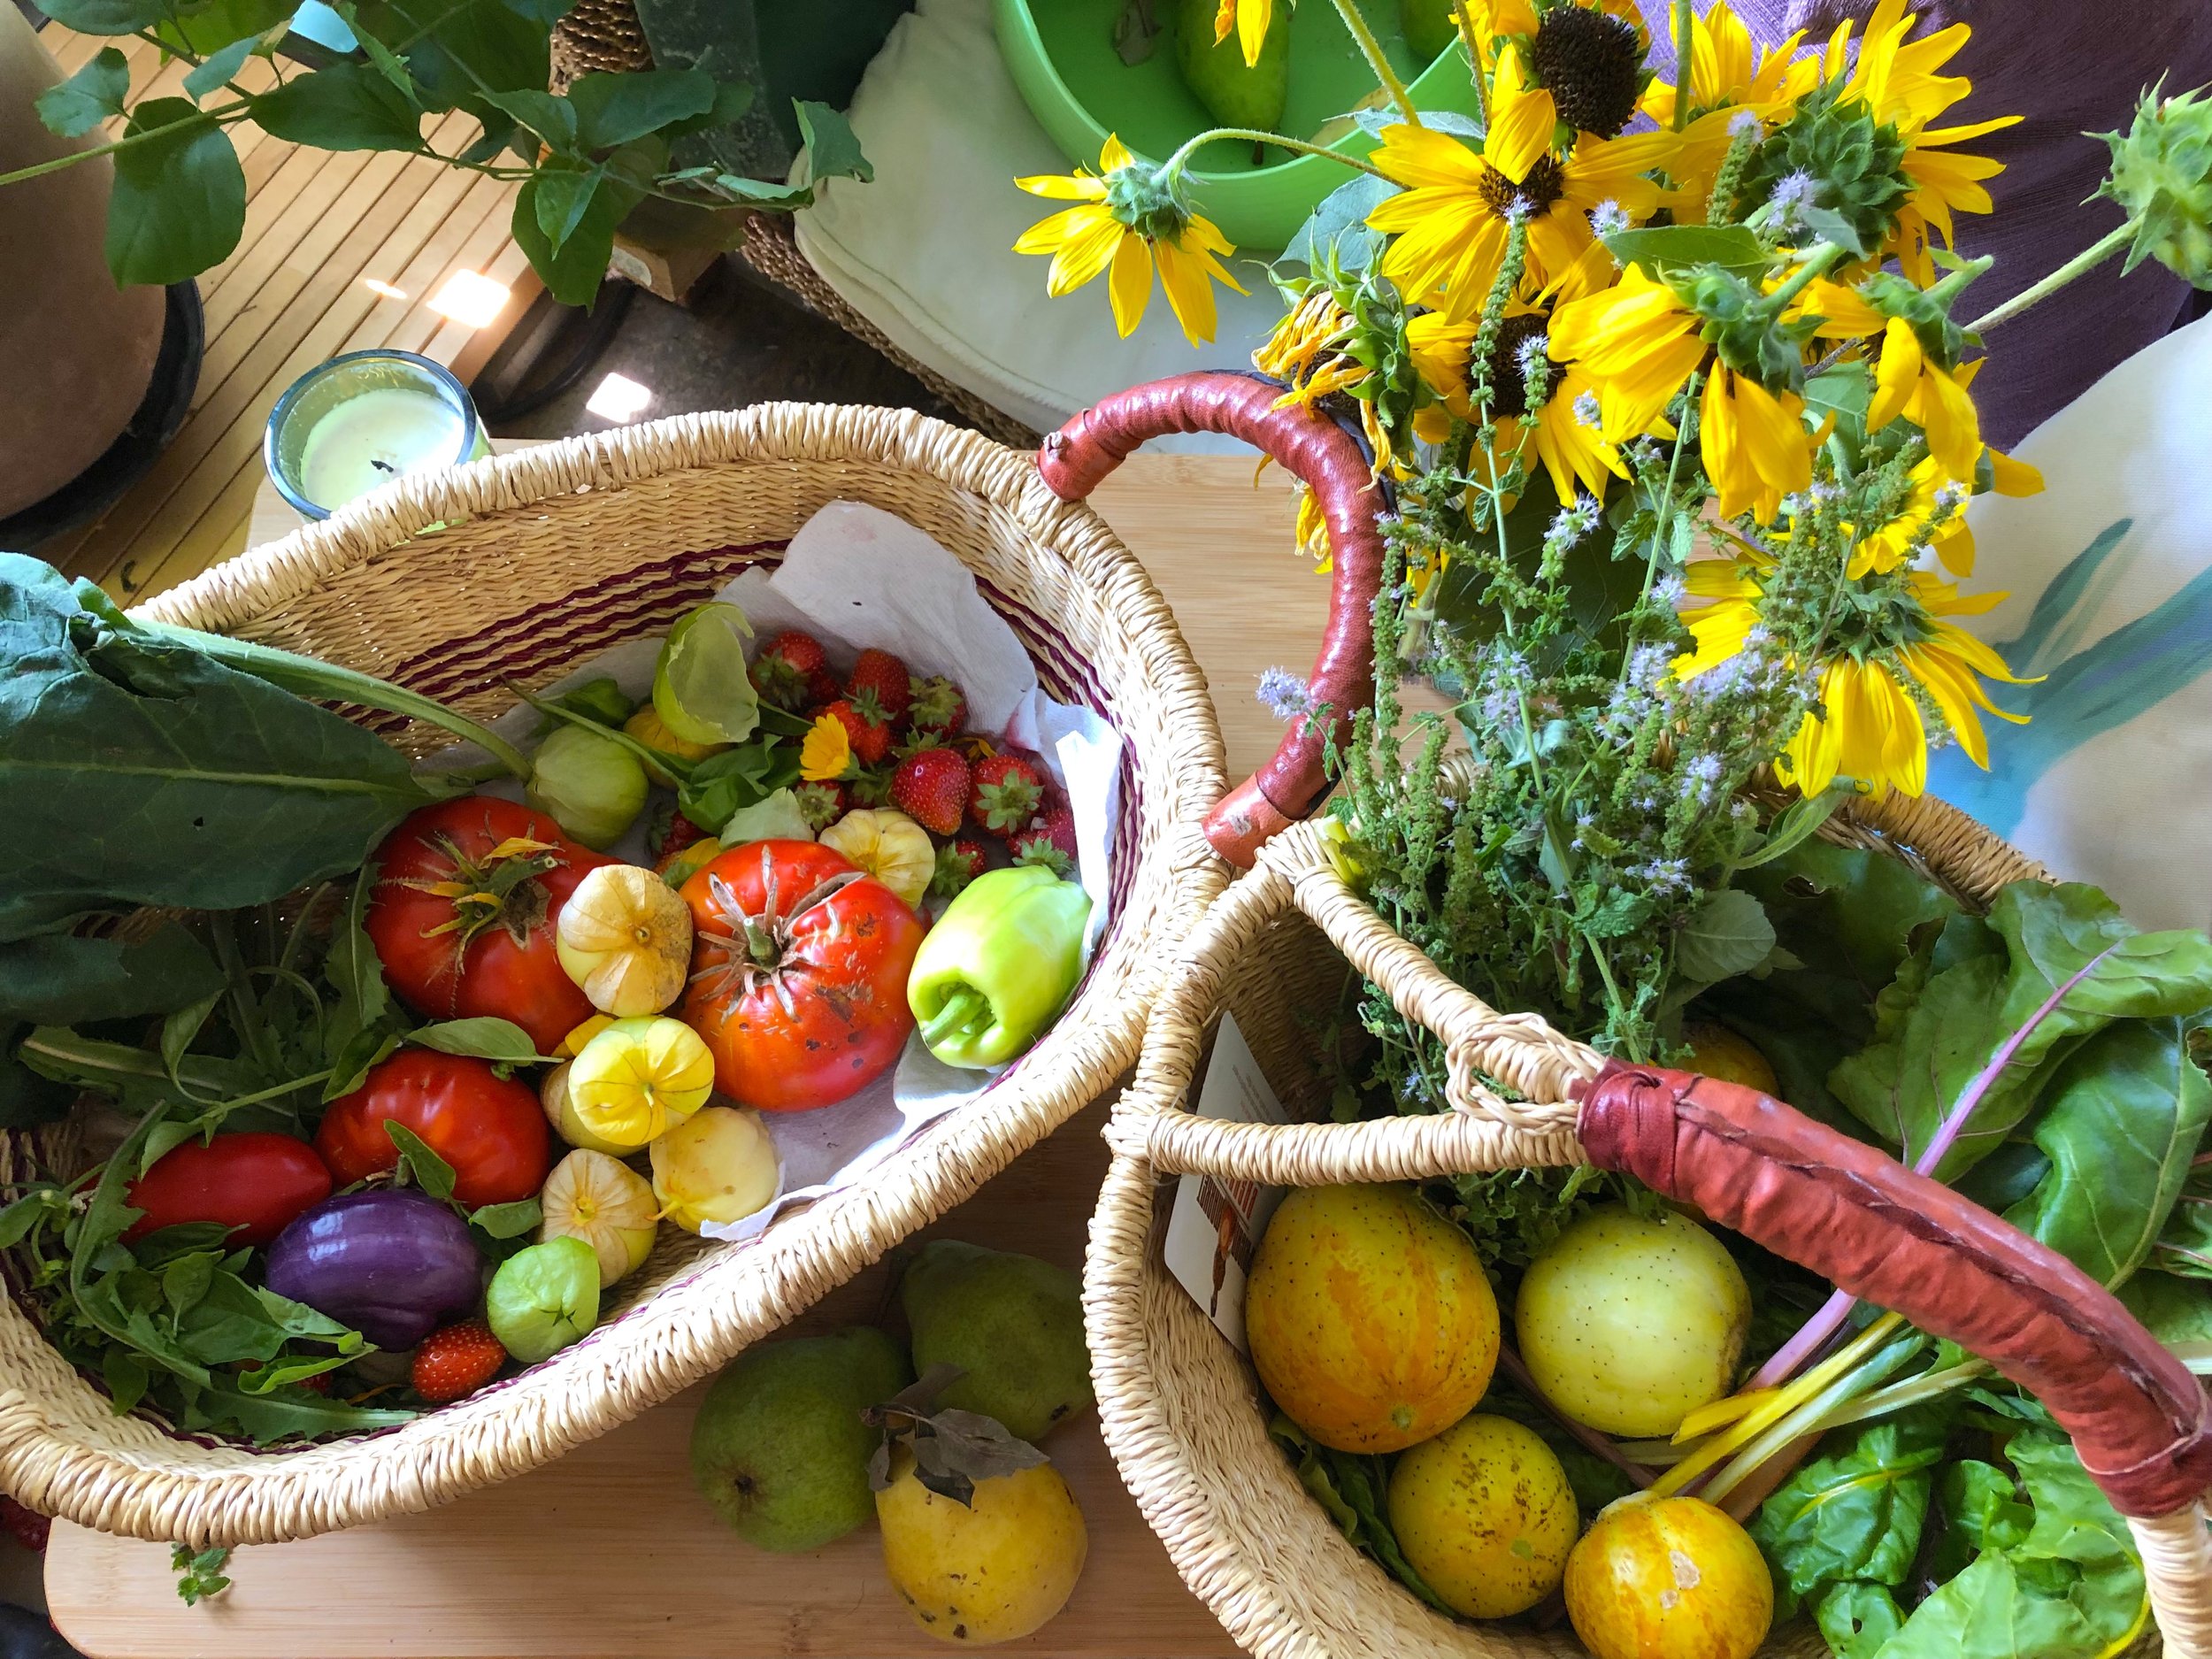
A Mini Veggie Harvest Mid-season 2020


A Colorful Succulent Rock Planter