7790 S harlan way
leann hoye’s landscape refresh
LAND HARMONIZATION | LANDSCAPE DESIGN | THE LAVENDER FIELD | MONTHLY GARDEN CONSULT + TIPS
SOLAR + LUNAR QUADS
YOUR BALANCED GRID IS NOW ACTIVATED
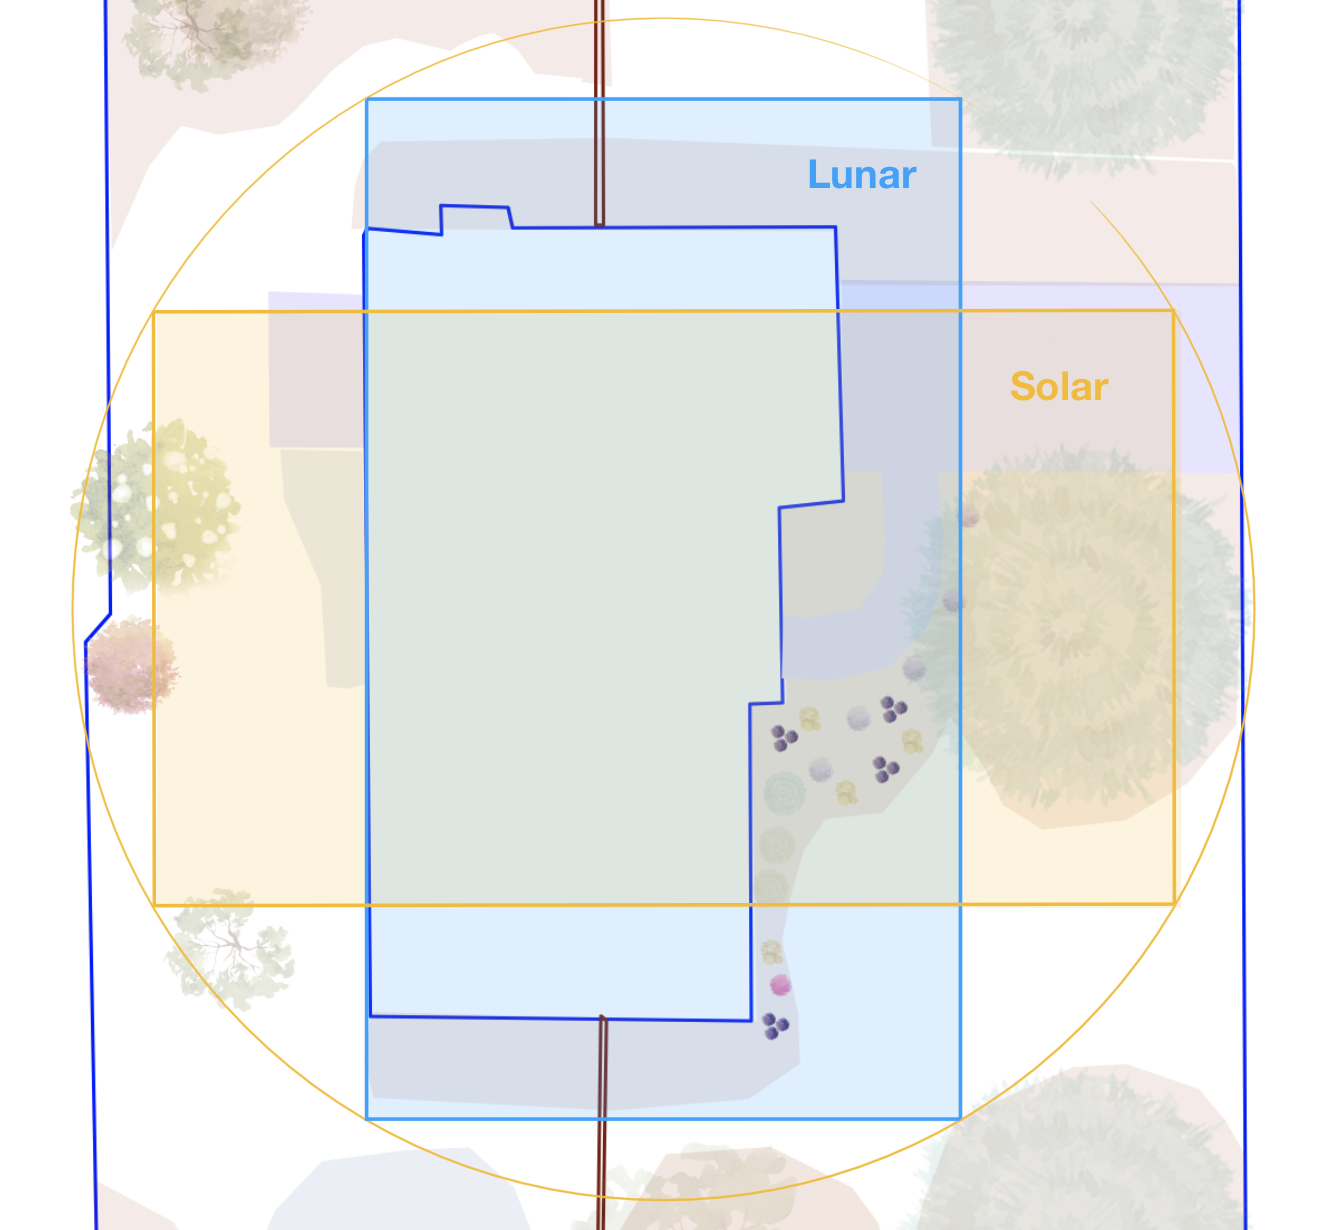
How does solar and lunar geometry influence your space?
In holistic spatial design and geometric alchemy, a solar quadrilateral grounds an environment and harmonizes the building's interaction with the earth. This rectangle helps introduce greater balance within the ‘field’ of any excessive yang (active, heat, invigorating) properties.
This could refer to more subtle electromagnetic influences, or denser energies traveling through electric lines, earth, water, or air that may otherwise have a destabilizing effect.
Placing a lunar quadrilateral afterward is perceived to introduce balancing yin (receptive, cooling, restorative) properties to offset the initial active, masculine energy.
Specific perceived benefits may include:
Biofield Harmonization: It acts as geometric alchemy, specifically designed to activate and fine-tune the Biofield Harmonics blueprint of a structure to promote a restorative environment.
Energy Balancing: The lunar aspect serves as a secondary layer that promotes a state of "rest" and inner calm, which balances the active energy (yang) of the initial solar structure.
Enhanced Restfulness: May improve the overall atmosphere or feeling of a home—often described as feeling a more natural resonance, flow, vibe, state, or frequency.
It is recommended to work with the grids whenever you can in alignment with the lunar and solar seasons. Regular attunement helps keeps your intentions fresh and the energies in alignment.
YARDSCAPE DESIGN
SEMI-NATIVE LOW-WATER USE THEME
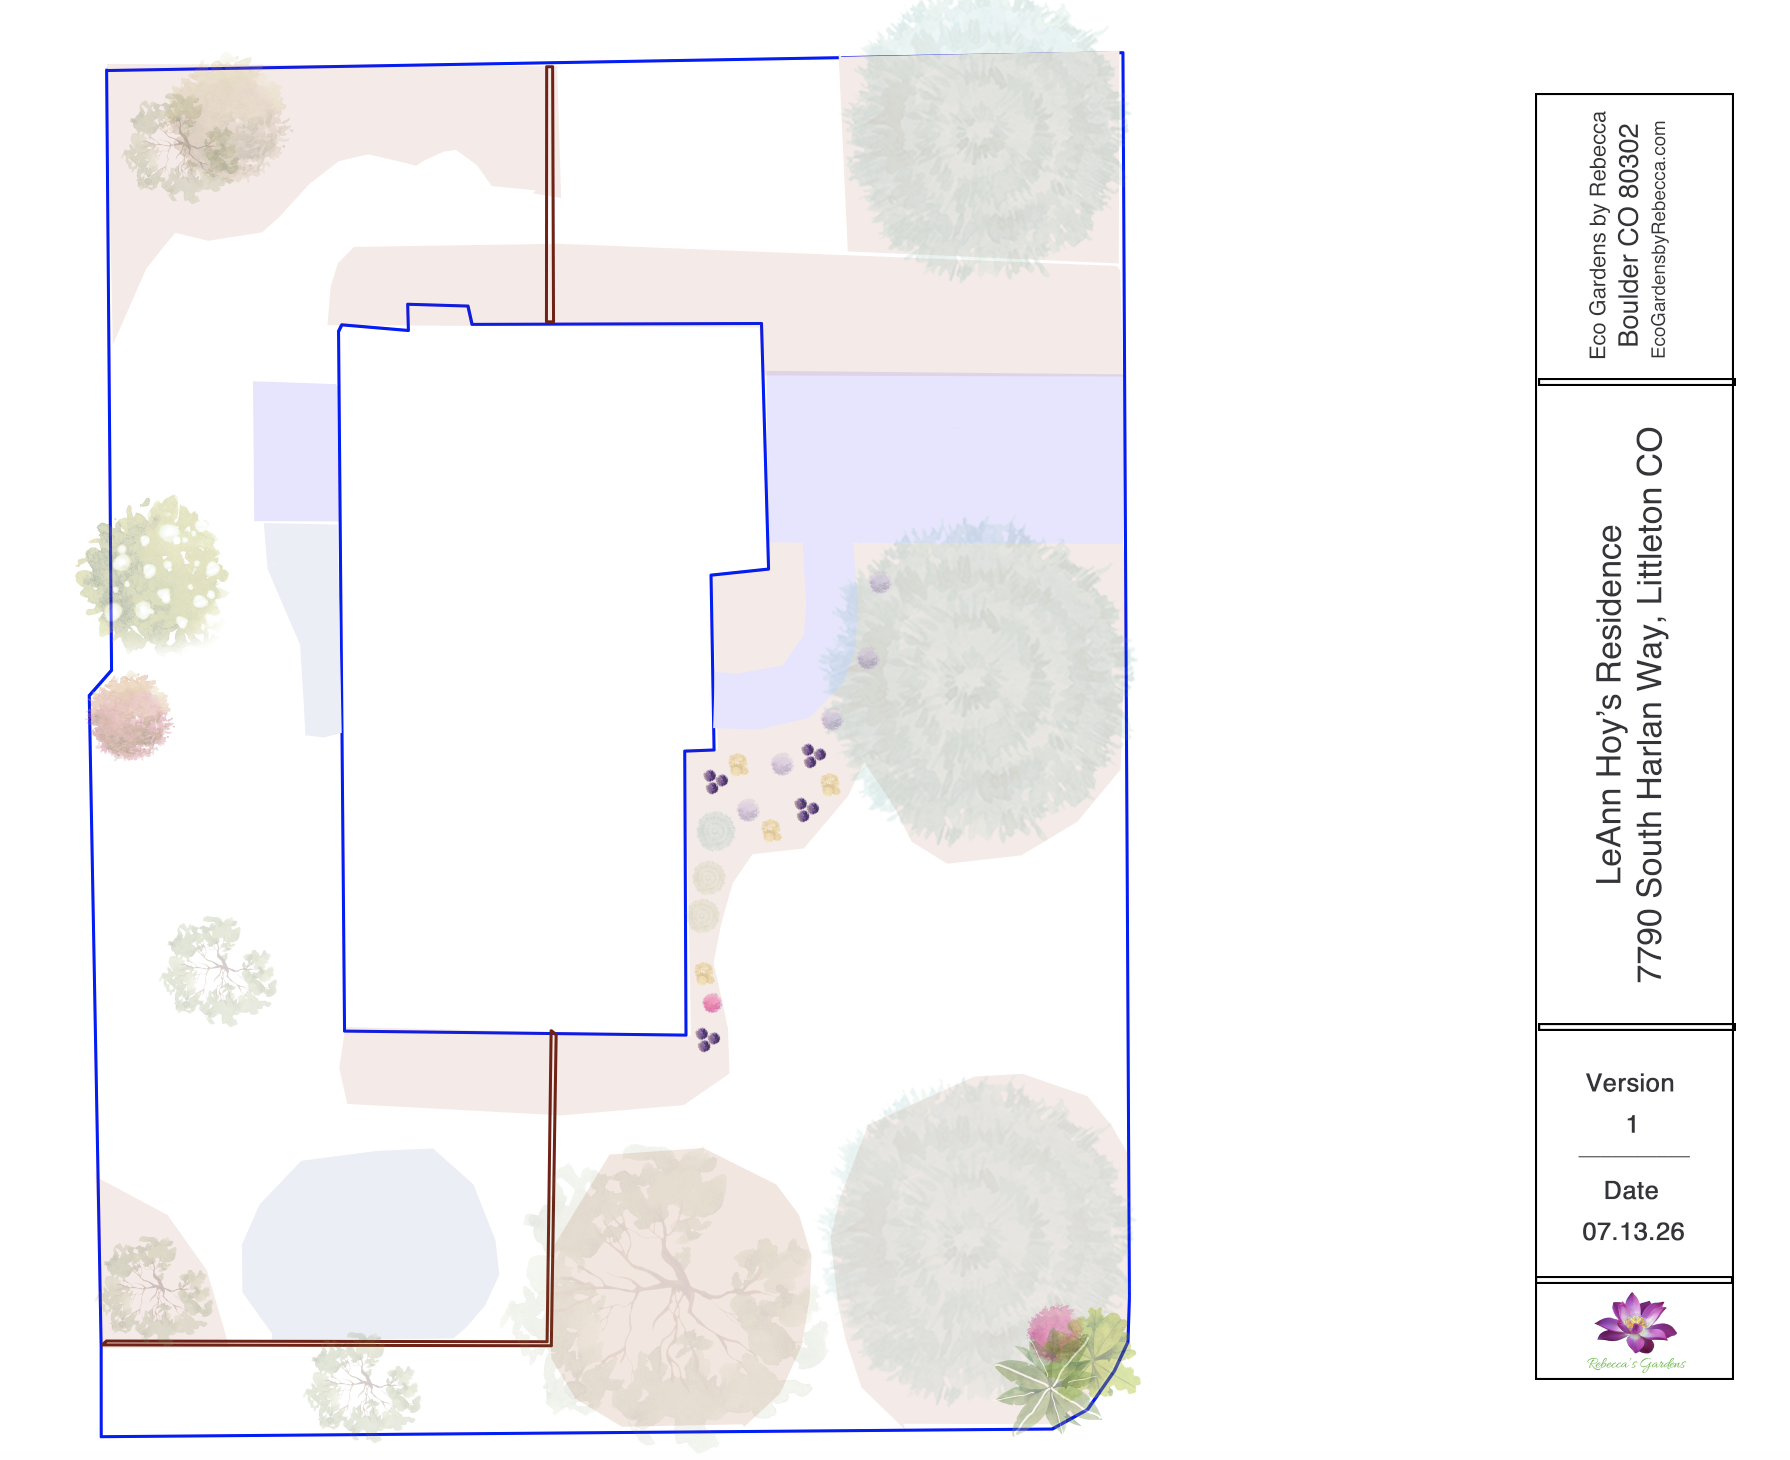
The Lavender Field
PLANTING DESIGN
CONCEPT IMAGES
TBD
Creating Your lavender field
A ROUGH Step by Step Project Outline
Goal: Create a Garden suitable for growing lavender in a 450sq ft area on a slight rise in Colorado full sun!
Timeframe: Up to 3 days with a team of 2 people.
Site Prep and Soil Structure
Break Top Layer Existing Soil Compaction: Till in 1 inch of small 1/4-inch bark chips or compost into the upper 6 inches to create air pockets.
Leverage the Slope: Build slight raised rows or mounds running along the slope. Planting on mounds ensures water sheds away from the crowns.
Check pH and Mulch: Lavender prefers a neutral to slightly alkaline pH. Top-dress with pea gravel or crushed stone instead of wood mulch to keep crowns dry
Plant Selection and Layout
Choose Hardiness: Recommending cold-hardy English lavender (Lavandula angustifolia) cultivars like Munstead or Hidcote, which survive Colorado winters well.
Spacing: Space plants 30 to 36 inches apart to ensure strong airflow and prevent root rot.
Spruce Consideration: Keep the garden outside the drip line and root zone of the mature evergreen spruce so the lavender gets full sun (6–8 hours) and avoids acidic needle drop.
Watering and Maintenance
Establishment: Water new plants deeply every few days for the first month, then taper off. Winter water the first season. Established lavender needs water only every 2 to 3 weeks.
Spring Pruning: Give plants a light haircut in early spring, cutting back into green growth but never into old dead wood.
How build this garden layout:
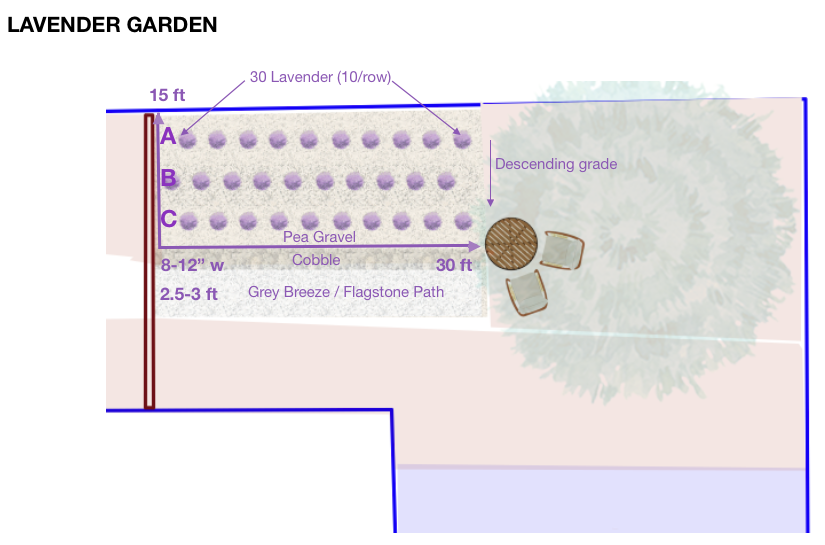
3 Rows: Build three long, mounded dirt berms (ridges) running horizontally across the slope. This stops water from washing away soil and forces it to drain past the roots as it runs downhill.
The Staggering: Notice how Row 2 is shifted? Planting in a "W" or offset pattern gives each lavender plant a full 3 feet of breathing room in all directions, which is your best defense against root rot.
The Water Buffer: Ideally, keep the row closest to the spruce tree at least 5 to 10 feet away from the tree's outer branches so the tree roots don't steal water from your new plants.
Materials for your Lavender Garden
To build your 30' x 15' (450 square feet) lavender garden with mounded rows, you may need approximately:
> 1 - 1.5 cubic yards of small bark chips
> 1/2 - 3/4 of a cubic yard of compost (or up to 6-8 bags depending on the nutrients and volume)
> 2-3 cubic yards of pea gravel.
Bulk materials are typically sold by the quarter or half-yard, so these numbers are rounded up slightly to ensure you have enough material to complete the project.
Material Quantity Breakdown
1/4" Small Bark Chips (1.5 Cubic Yards): This provides a 1-inch layer across the entire 450 sq. ft. area. Tilling this into your compacted Colorado soil creates vital, permanent air pockets so the roots can breathe.
Compost (0.75 Cubic Yards): This provides a light 0.5-inch layer to blend into your mounded rows. Lavender hates rich soil, so this small amount offers just enough low-level nutrients without holding onto dangerous amounts of moisture.
Pea Gravel Mulch (3.0 Cubic Yards): This provides a thick 2-inch deep security blanket across the entire garden. It keeps the lavender crowns bone-dry, reflects heat up into the plants, and stops weeds from taking over.
Pro-Tips for Installation
The Mix: Spread your bark chips and compost over the garden area first, then use a tiller or hand fork to break up the compacted soil, blending everything together down to a depth of about 6 inches.
The Mounds: Rake the blended soil into your three long, 2-foot-wide ridges across the slope. This naturally creates the raised channels that force water away from the plants.
The Gravel Finish: Plant your lavender directly into the mounds first, then spread the pea gravel over the remaining open ground. Tuck the gravel right up under the base of the plants to protect the stems from damp soil.
This project may take up to 3 full days of physical labor for a team of two people. Because Colorado soil is notoriously hard to work, breaking it up and moving bulk materials will consume most of your time. Splitting the work into a logical sequence ensures you do not exhaust yourselves or compromise the soil structure.
Project Timeline Overview
Phase 1: First (Day 1) — Soil Prep and Compaction Busting
Clear the Site: Remove any existing weeds, grass, or large rocks from the 30' x 15' footprint.
Mark the 3 Rows: Use spray paint or colored flags to mark where the 3 planting rows will be. Keep a narrow walking path in between each mounded row. To conserve energy, only dig where your three mounded rows will sit, leaving the walking paths compacted.
Spread Amendments: Dump and evenly spread your bark chips and compost directly over the native soil.
Till It In by hand using shovels, picks, and/or bars. Bust up any large clods of clay for a more even soil texture.
Phase 2: Next (Day 2) — Shaping and Planting
Rake the Mounds: Use hard rakes or heavy-duty bow rakes to pull the loose, amended soil into your three horizontal rows. The mounds should be about 2 feet wide and 6 to 8 inches high.
Stage the Staggered Layout: Before digging any holes, place your potted lavender plants directly on top of the mounds using the staggered "Z" pattern. Measure 3 feet from center to center to verify your spacing.
Planting: One person digs the small holes in the soft mounds while the other person gently removes the plants from their pots, loosens the root balls, and sets them in the ground.
Water each plant deeply immediately after it goes into the dirt.
Phase 3: Last (Day 3) — The Gravel Blanket
Staging the Wheelbarrow: Did you know 3 cubic yards of pea gravel weighs roughly 8,000 lbs! Protect your newly shaped mounds by dumping the gravel starting from the farthest edge of the garden and working your way out.
Shovel and Spread: The helper shovels gravel into the wheelbarrow, and the main person dumps it between the rows. Use a rake to smooth it out to a 2-inch depth.
Tuck the Crowns: Hand-pull the gravel right up to the base of each lavender plant. This creates a dry barrier that prevents wet Colorado soil from rotting the lower leaves.
Thoughts & Inspiration on the plan:
This garden is going to be an absolutely beautiful addition to your landscape, and doing it by hand will make the process incredibly rewarding.
Enjoy the satisfying work of helping ‘break new ground’, enriching those rows, and experiencing your new lavender thriving in the Colorado sun.
We’ll have a wonderful time creating it and sharing it in creative ways!
Happy Planting!
PLANT PICS
ENGLISH LAVENDER | Botanical Name: Lavandula angustifolia
2 Best Varieties for Colorado:
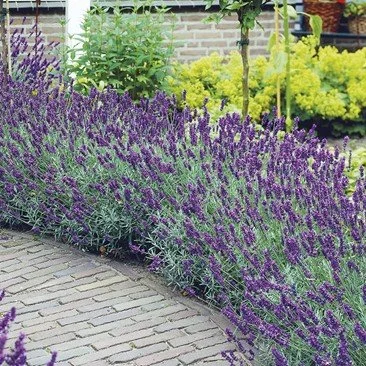
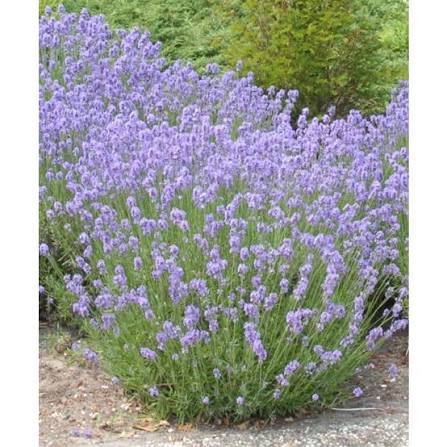
HIDCOTE
Flower Color and Appearance:
Features deep, rich, dark purple (violet-blue) flowers that are tightly packed on the stem, giving it a very tidy and formal look.
Bloom Time:
Hidcote: Blooms slightly later in the mid-season.
Foliage and Size:
Hidcote: Has silvery-gray foliage and grows compactly to about 12 to 20 inches tall.
MUNSTEAD
Flower Color and Appearance:
Produces softer, lighter lavender-blue flowers with a slightly more open, shaggy, and casual appearance
Bloom Time:
Blooms about 7 to 10 days earlier than Hidcote. Planting both extends your overall garden bloom window.
Foliage and Size:
Munstead: Has slightly greener foliage (gray-green) and reaches a similar compact height of 12 to 18 inches.
Performance in Colorado
Cold Hardiness: Both are cultivars of Lavandula angustifolia (English lavender) and are exceptionally cold-hardy, easily surviving Colorado winters (down to USDA Zone 5 or colder with proper care) with minimal winter dieback compared to hybrid lavenders.
Growing Conditions: Both need full sun and extremely well-draining soil. Colorado's heavy clay soil can trap moisture and rot their roots, so amend your soil with compost, expanded shale, or coarse sand, or plant them on a slope or in raised beds.
~ get into the garden More With
your Monthly wisdom consult ~
— Your Monthly Consults May Include —

How To Assess + Amend Your Soil
THE HEALTH OF YOUR PLANTS IS DIRECTLY RELATED TO THE QUALITY OF YOUR SOIL


Additional Natural Products
CLICK HERE FOR A FULL LIST OF RECOMMENDATIONS
for horticultural and vegetable gardens